If you’re in the education or worship ministry, you likely need a way to improvise or adapt to the extraordinary times we are all in. While social distancing is becoming a norm, there is a rising need to still carry out our responsibilities wherever we are. Some Dioceses of the Catholic Church have granted pastoral dispensation from hearing Holy Mass, and some schools have switched to online classes.
This is your guide on how to live stream with overlays like your Microsoft PowerPoint or Keynote presentations. We will cover solutions from using your smartphone down to complex devices and software. You might find this basic guide useful if you’re an educator, priest, pastor or trainer.
Let’s talk about the essentials first:
| Mobile | PC/Mac | |
| Streaming App | Streamlabs | OBS Studio/Xsplit |
| Overlays | Player.me/StreamElements | |
| Hardware Source | Camera | |
| Display Source | Smartphone | Monitor |
| Widgets | OPTIONAL | |
Streaming with your Smartphone
Whether you’re using a budget smartphone or a flagship device, it is possible to stream yourself with overlays using an application called Streamlabs. It is downloadable via Google Play or AppStore. You may also sideload it if you want to install it via Android devices without Google Playstore.
Here are the steps:
- Download Streamlabs on your device.
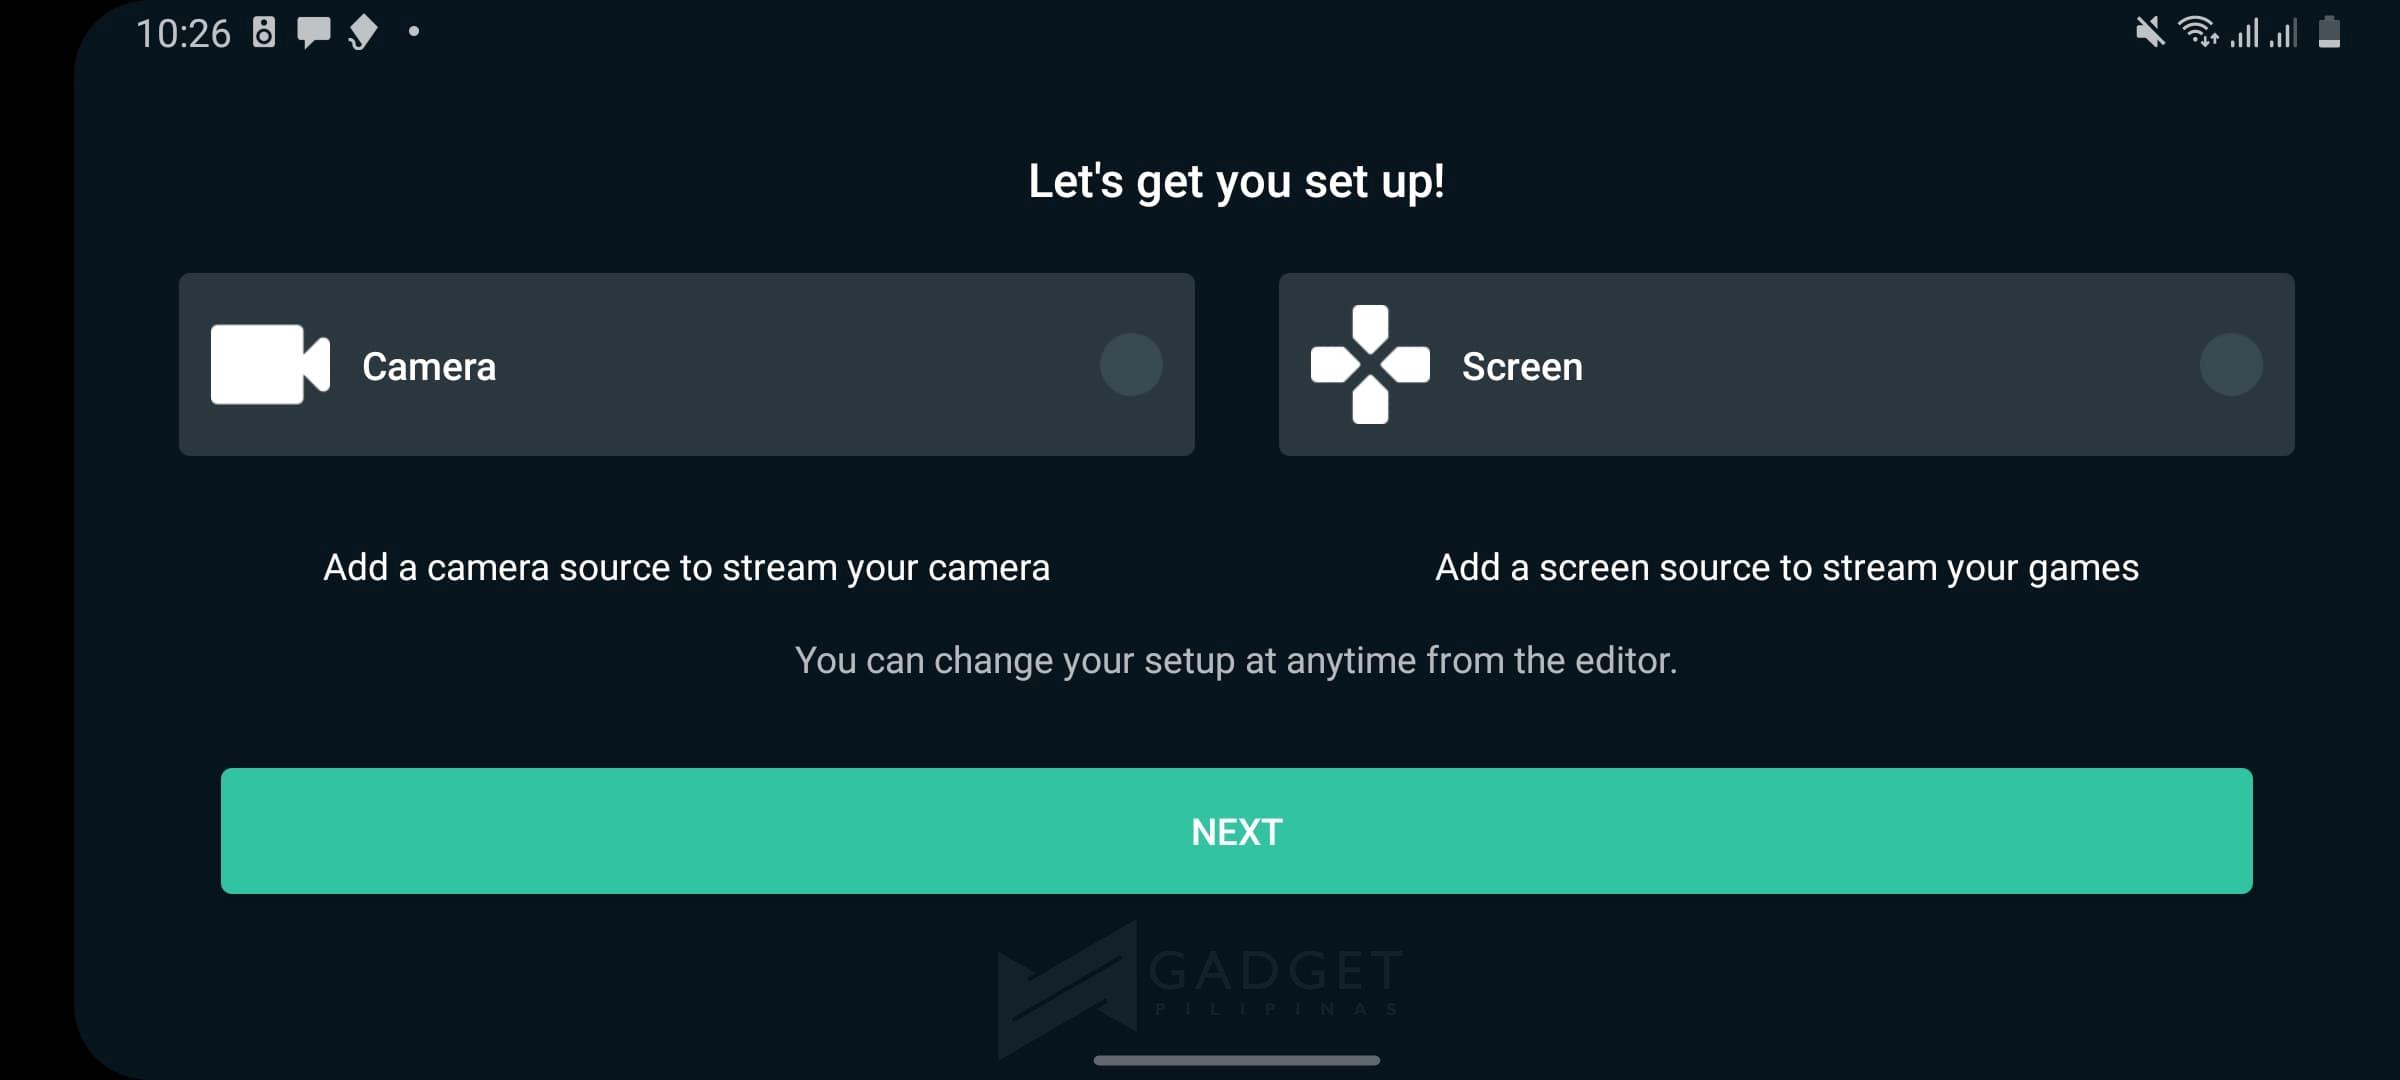
- After downloading the application, it will take you through the essential steps so you can start streaming.
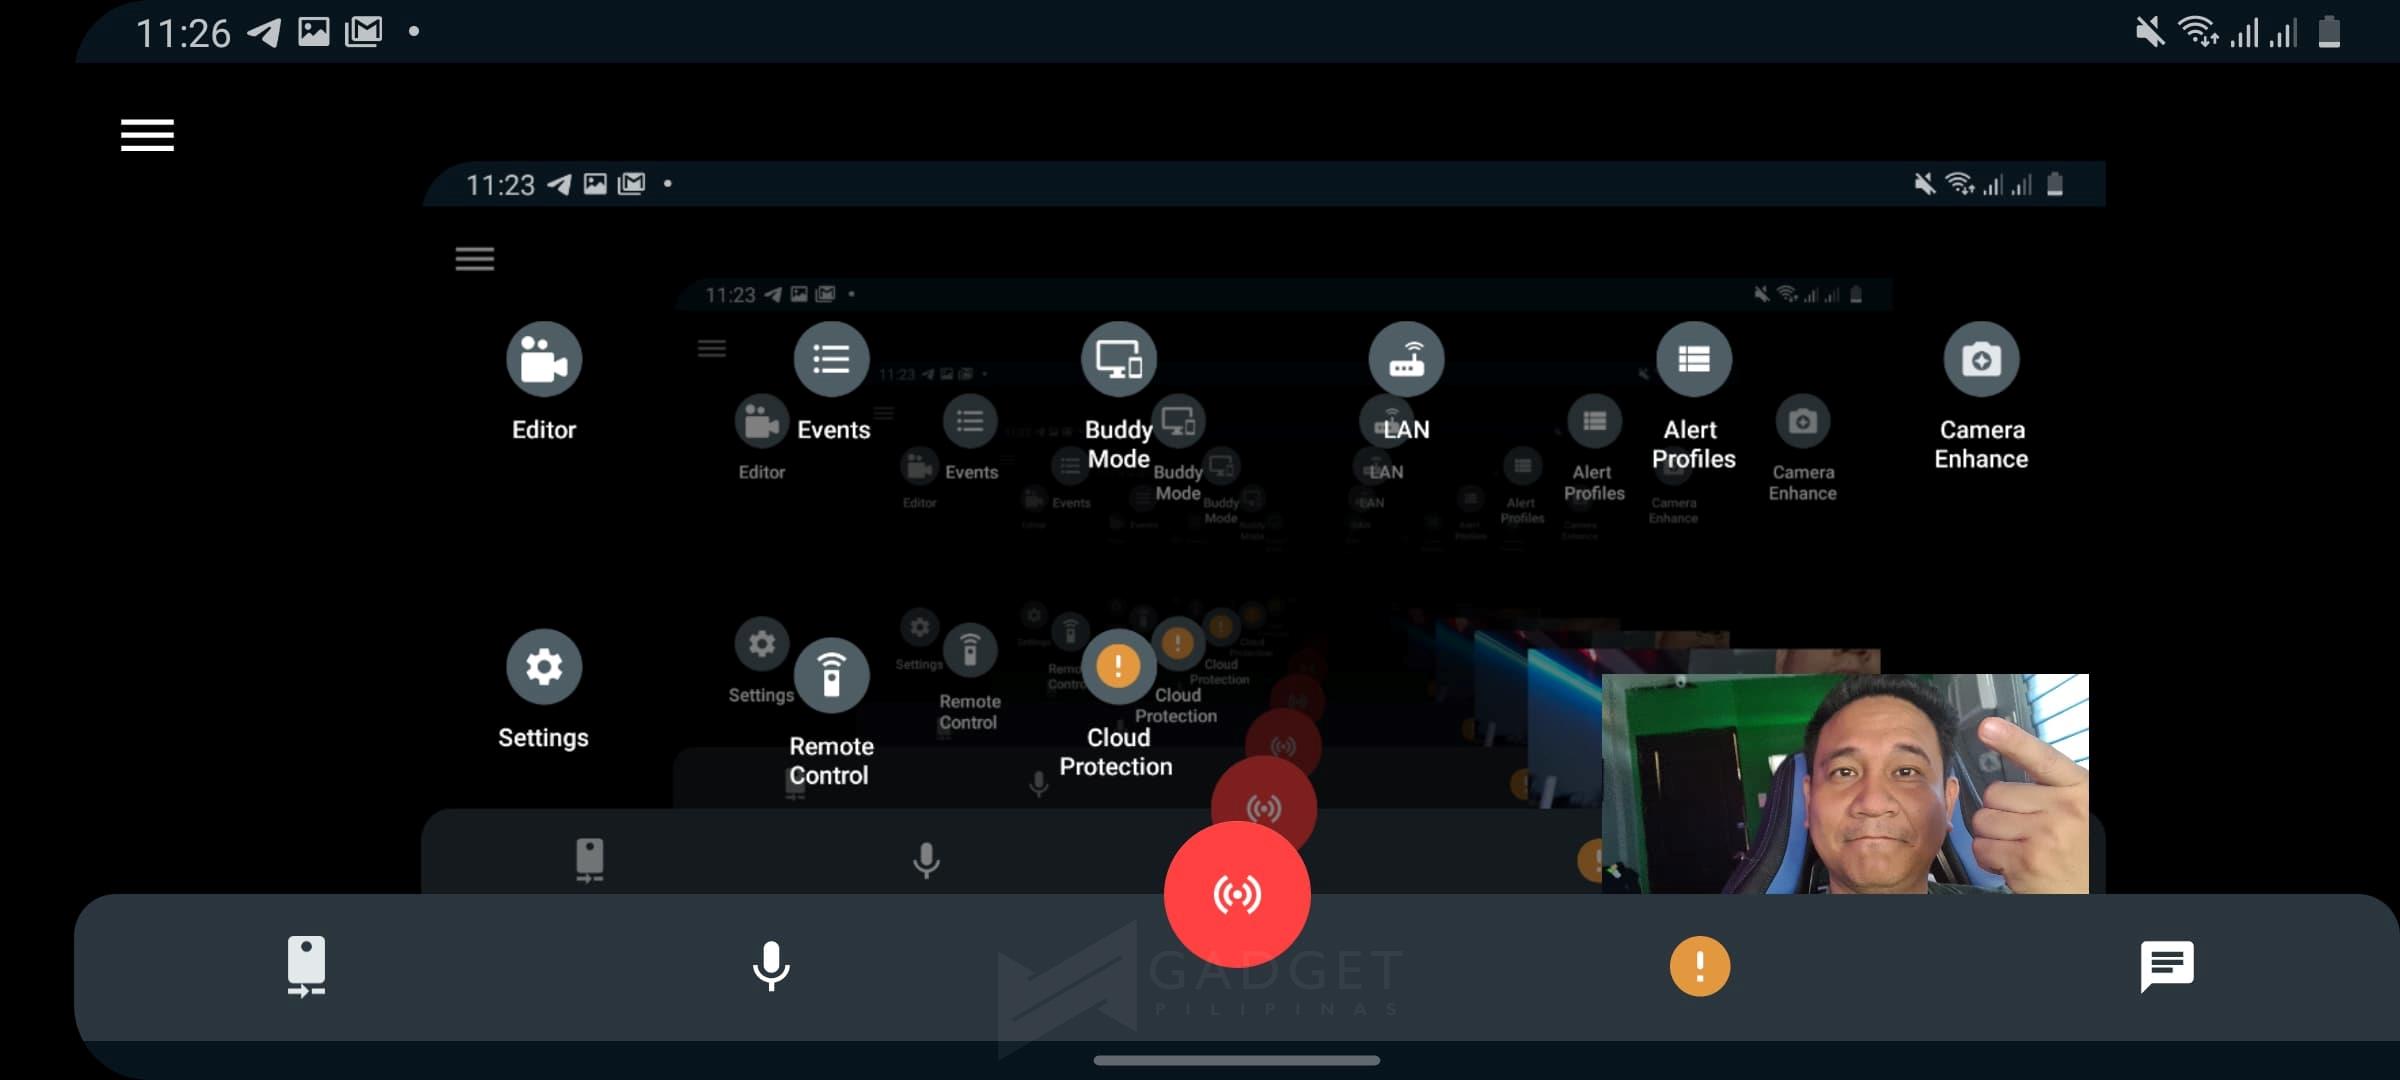
- There are 2 important things you need to understand here: there are 2 layers in your Streamlabs – Camera and Screen. Camera layer is hooked to your camera hardware. Screen layer displays everything that happens in your display. You can choose which layer is on top of the other.
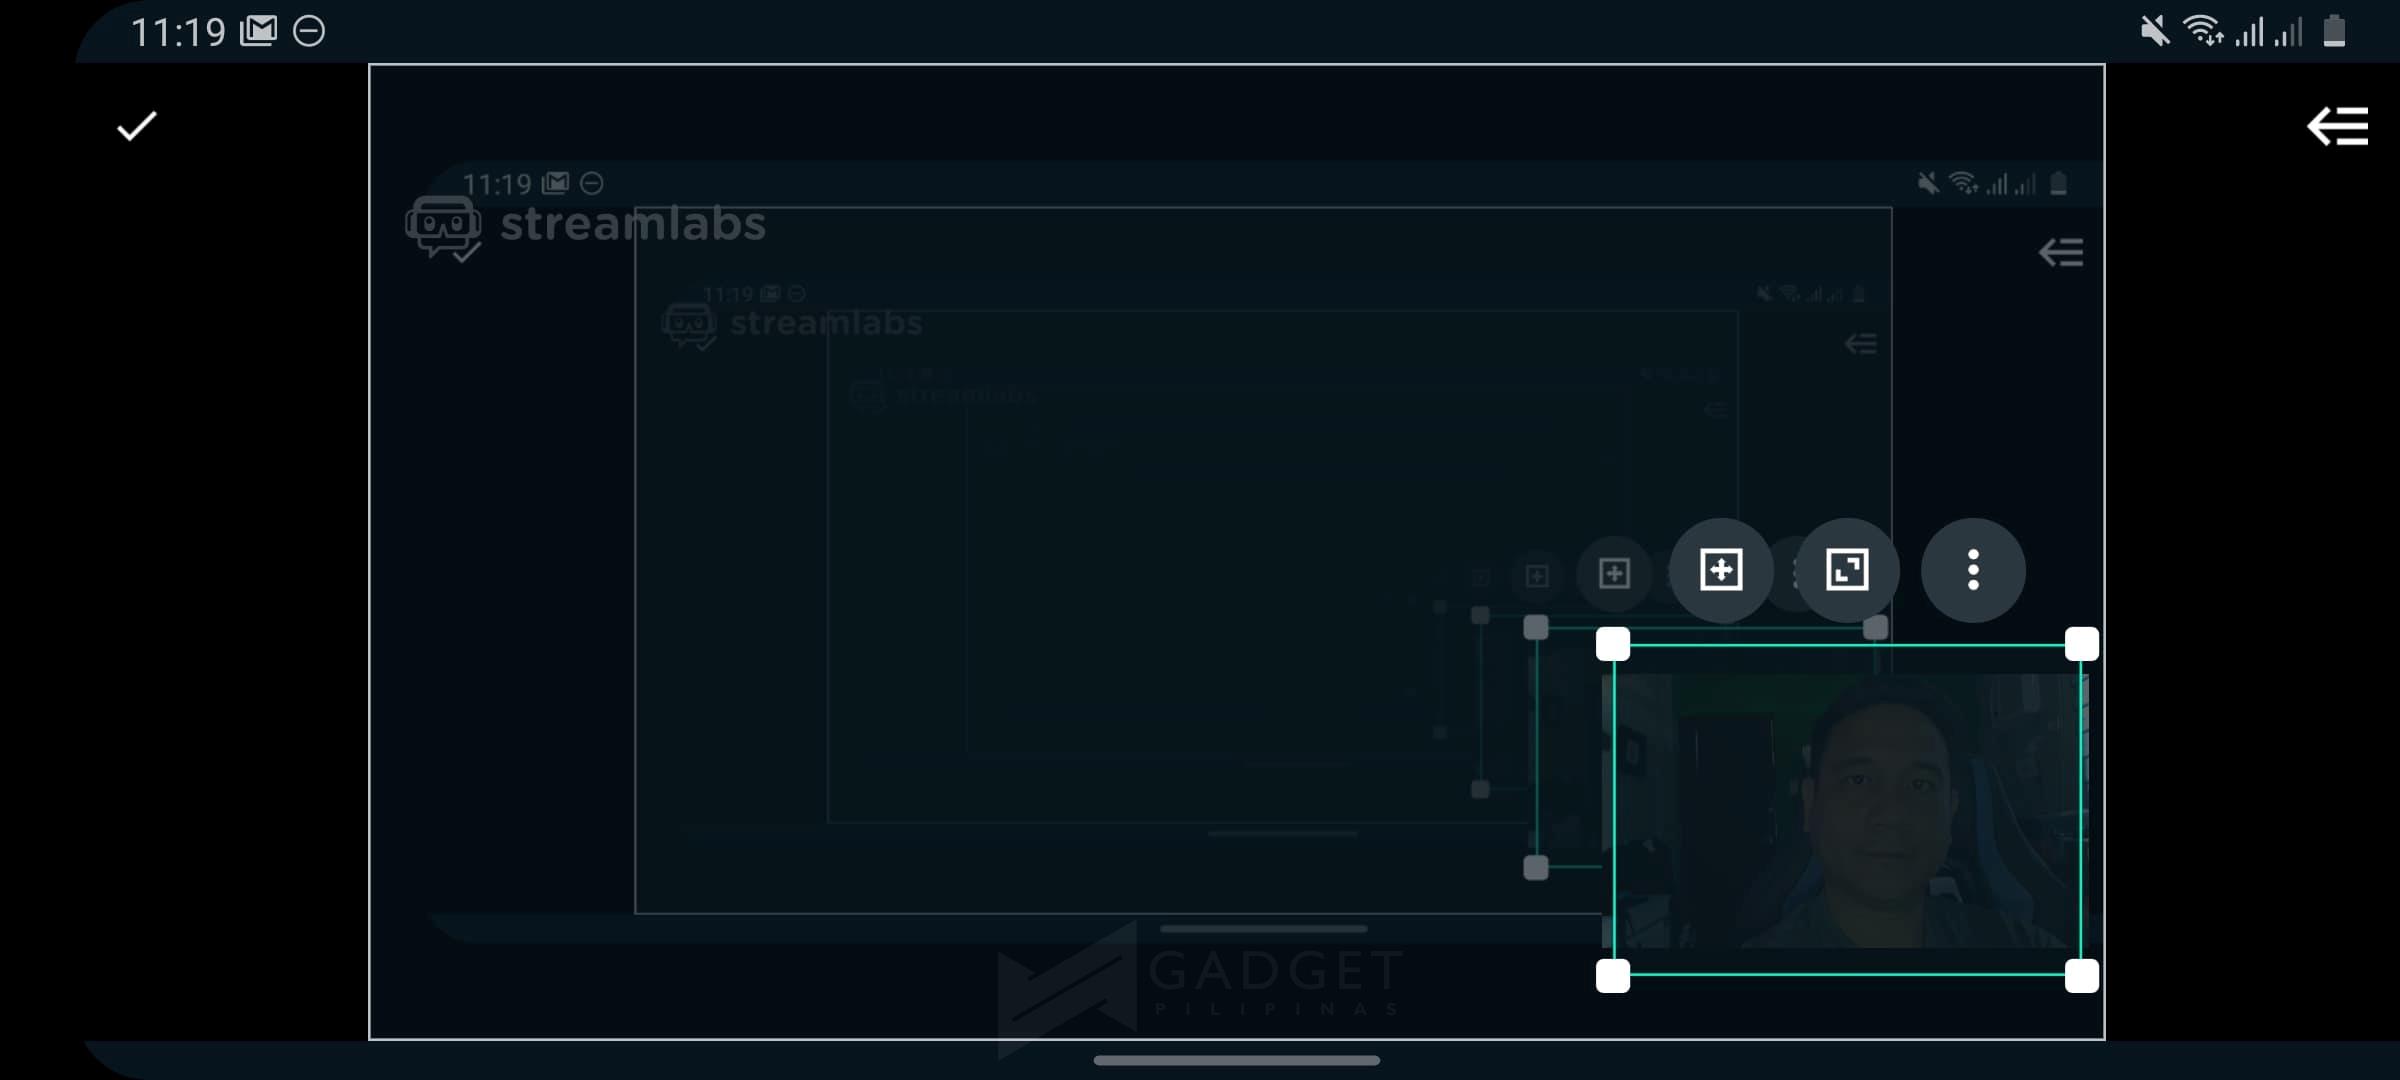
 If, for instance, you’re a teacher, and if you find the presentation material more essential to be shown than your face, you can easily maximize the presentation material, and resize the Camera layer down to a minimum.
- While this one is optional, you can also use Player.me/StreamElements to setup a default static overlays that shows your name, date, URL, etc. You can set this up on your smartphone or PC/Mac, and copy the URL to your StreamLabs on your smartphone. Simply Add Widget layer (should be on top of all other layers), choose custom URL and past the URL you got from Player.me/StreamElements.
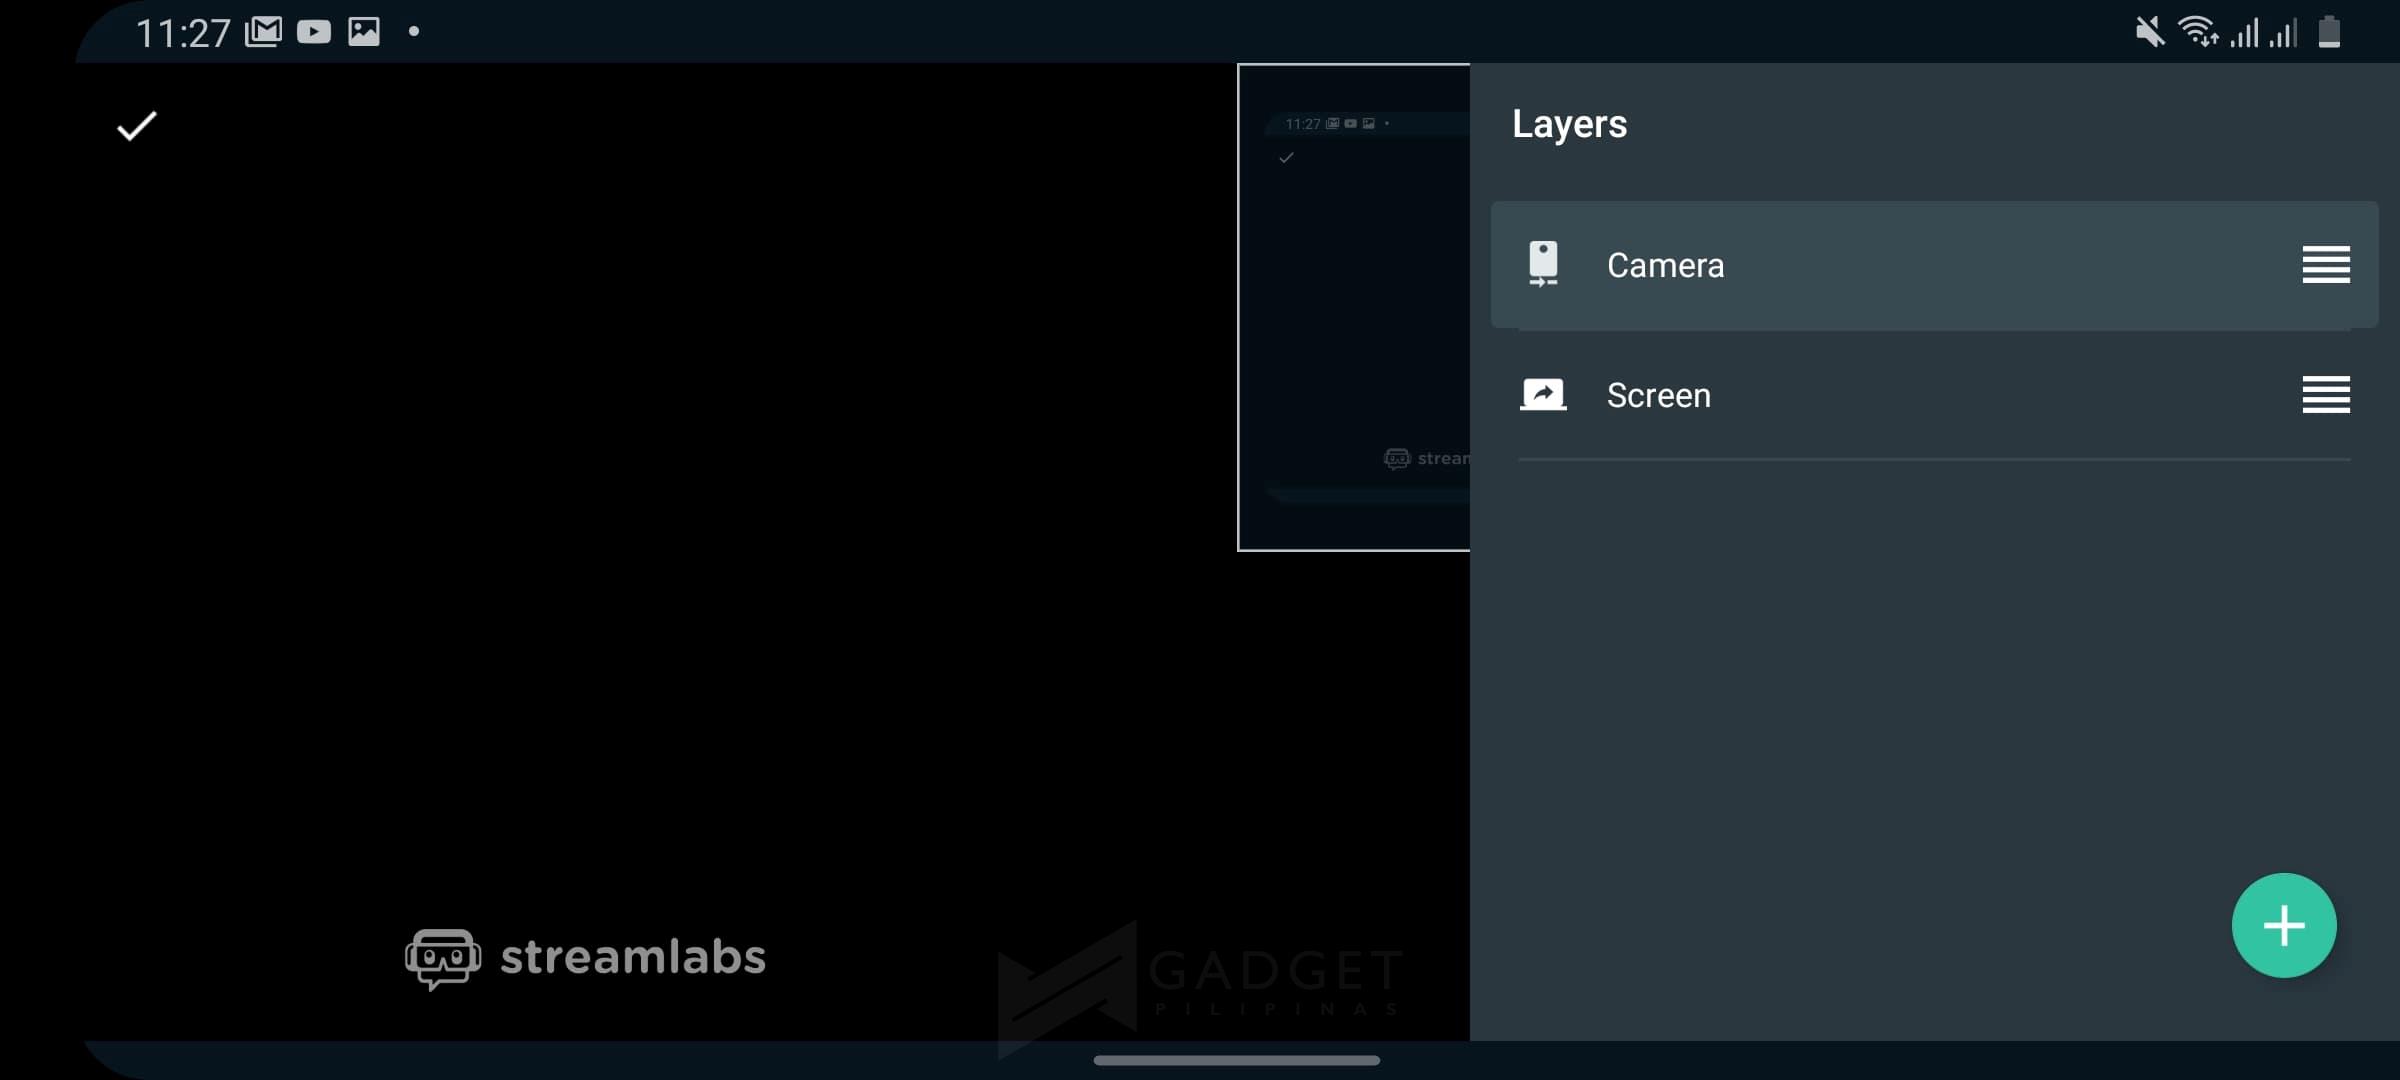
- The only problem with using a smartphone is that it won’t be easy to switch from a specific scene to another. By ‘scene’, we mean, switching the layout of your layers. If you work in the worship ministry, there will be times when the camera layer needs to be prioritized especially during the preaching or homily part. With Streamlabs, you will need to go to Layers, and manually disable the screen and resize the camera accordingly. For this reason, we are only recommending to use the smartphone as your streaming device if there is no available PC/Mac around.
- When you’re ready to stream, start by clicking the Stream button (Red button), and switch to the application you wish to use while streaming. This could be your PDF viewer or PowerPoint file where you can show the topic of the day or worship scriptures you want your viewers to see. It is recommended to test this by streaming exclusive to yourself or to one person to know if it works properly from your end.
Limitations and Challenges when using your smartphone:
- You cannot record your session using StreamLabs.
- There is no easy way to switch Scenes.
- Sensitive or personal notifications may popup while streaming. It is recommended to sign-off from or turn off notifications of Facebook messenger, SMS, Viber, etc. while streaming.
Streaming with PC or Mac
Streaming with your PC or Mac is our most recommended process.
There are 2 essential applications to choose from: OBS Studio and Xsplit Broadcaster. The former is a free open-source software that basically allows you to stream without spending a dime. Xsplit Broadcaster, on the other hand, is a premium streaming platform that opens a lot of ways for users to explore. This is also a lot easier to set up or configure.
Whether you’re going to use OBS Studio or Xsplit Broadcaster, you need to understand also of the difference between Source and Scenes. We covered this earlier but knowing this is far more important when using a PC/Mac to stream.
- “Source” answers the question: “What are the parts that I can show my viewers see on my stream?”
- “Scenes” answers the question: “What preset of sources with set configurations that I want to show my viewers on my stream?”
Below is a matrix of requirements before you start streaming per platform of choice:
| PC/Mac | |
| Streaming App | OBS Studio or Xsplit |
| Overlays | Player.me/StreamElements |
| Camera Source | Webcam |
| Window Source | Microsoft PowerPoint, or |
| PDF Viewer, or | |
| Other windows you wish to show on your stream | |
| Audio in Source | Microphone connected to your PC |
| Audio out Source | PC/Mac Speakers |
| Display Source | Monitor |
Streaming with OBS
- Download OBS in this link.
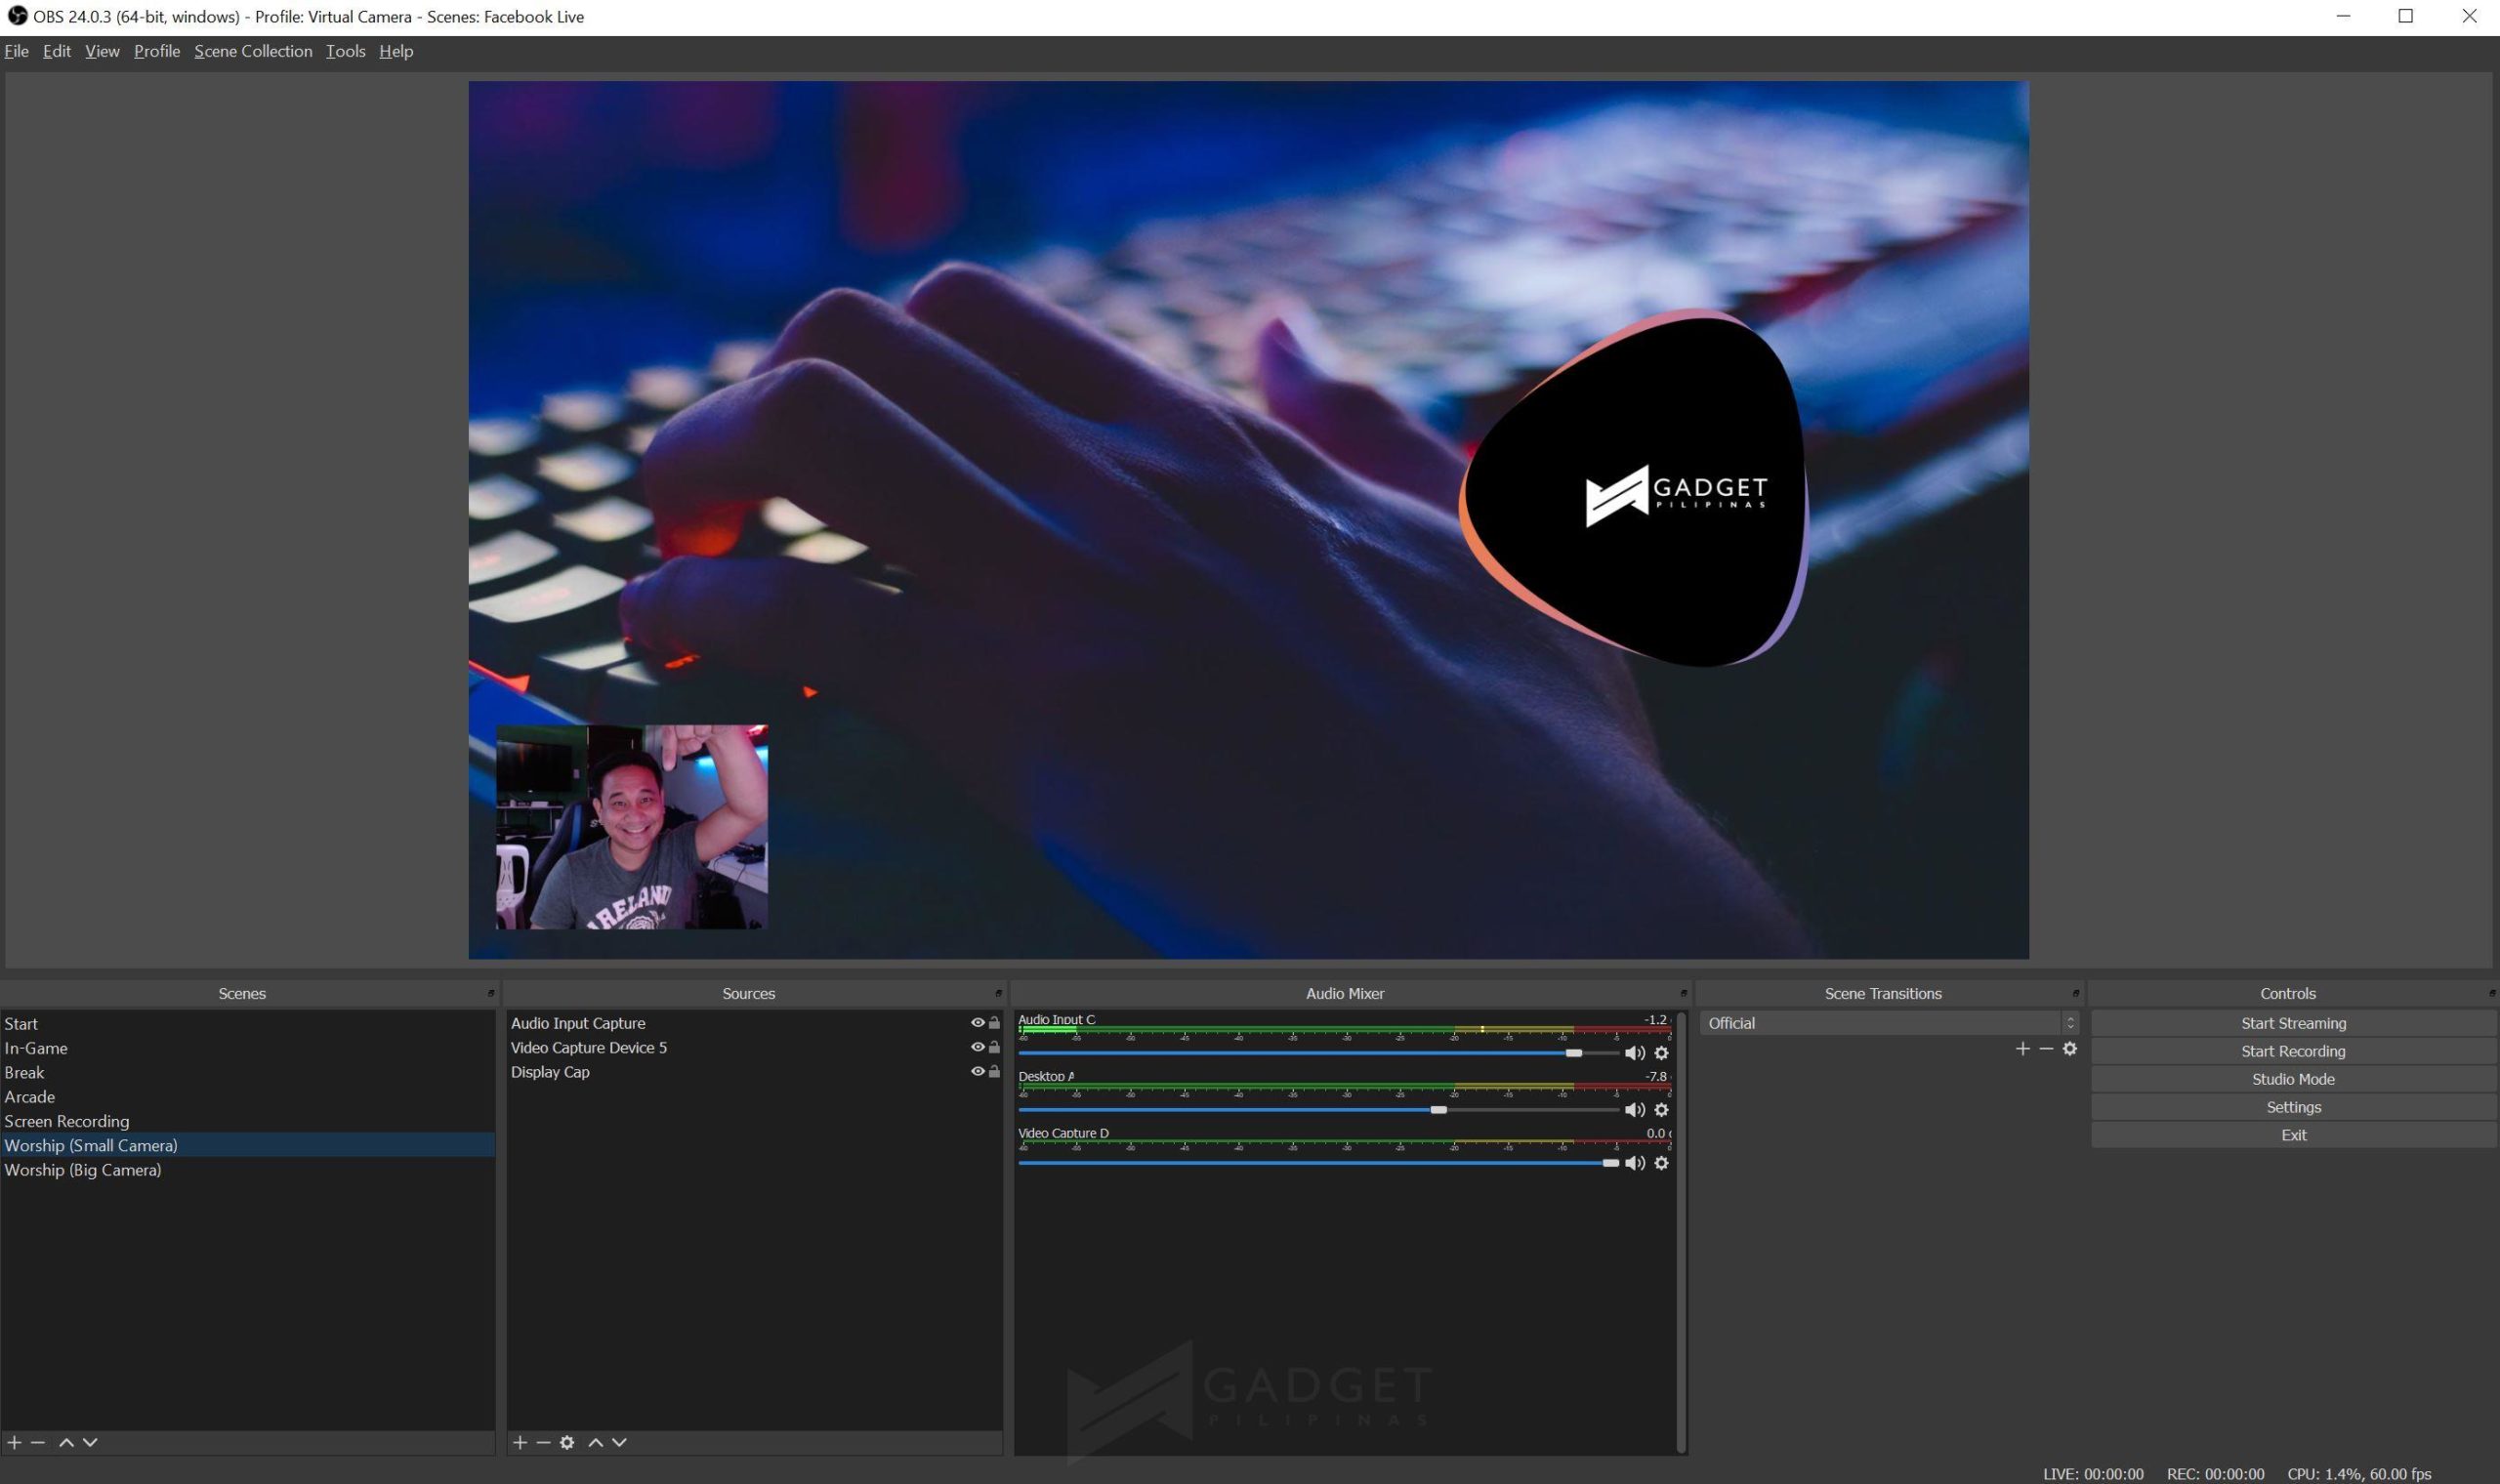
- Fire up OBS, and prepare a scene and include all the necessary sources in it with the following order (top to botttom): Audio In, Widget (optional), Camera, Window.
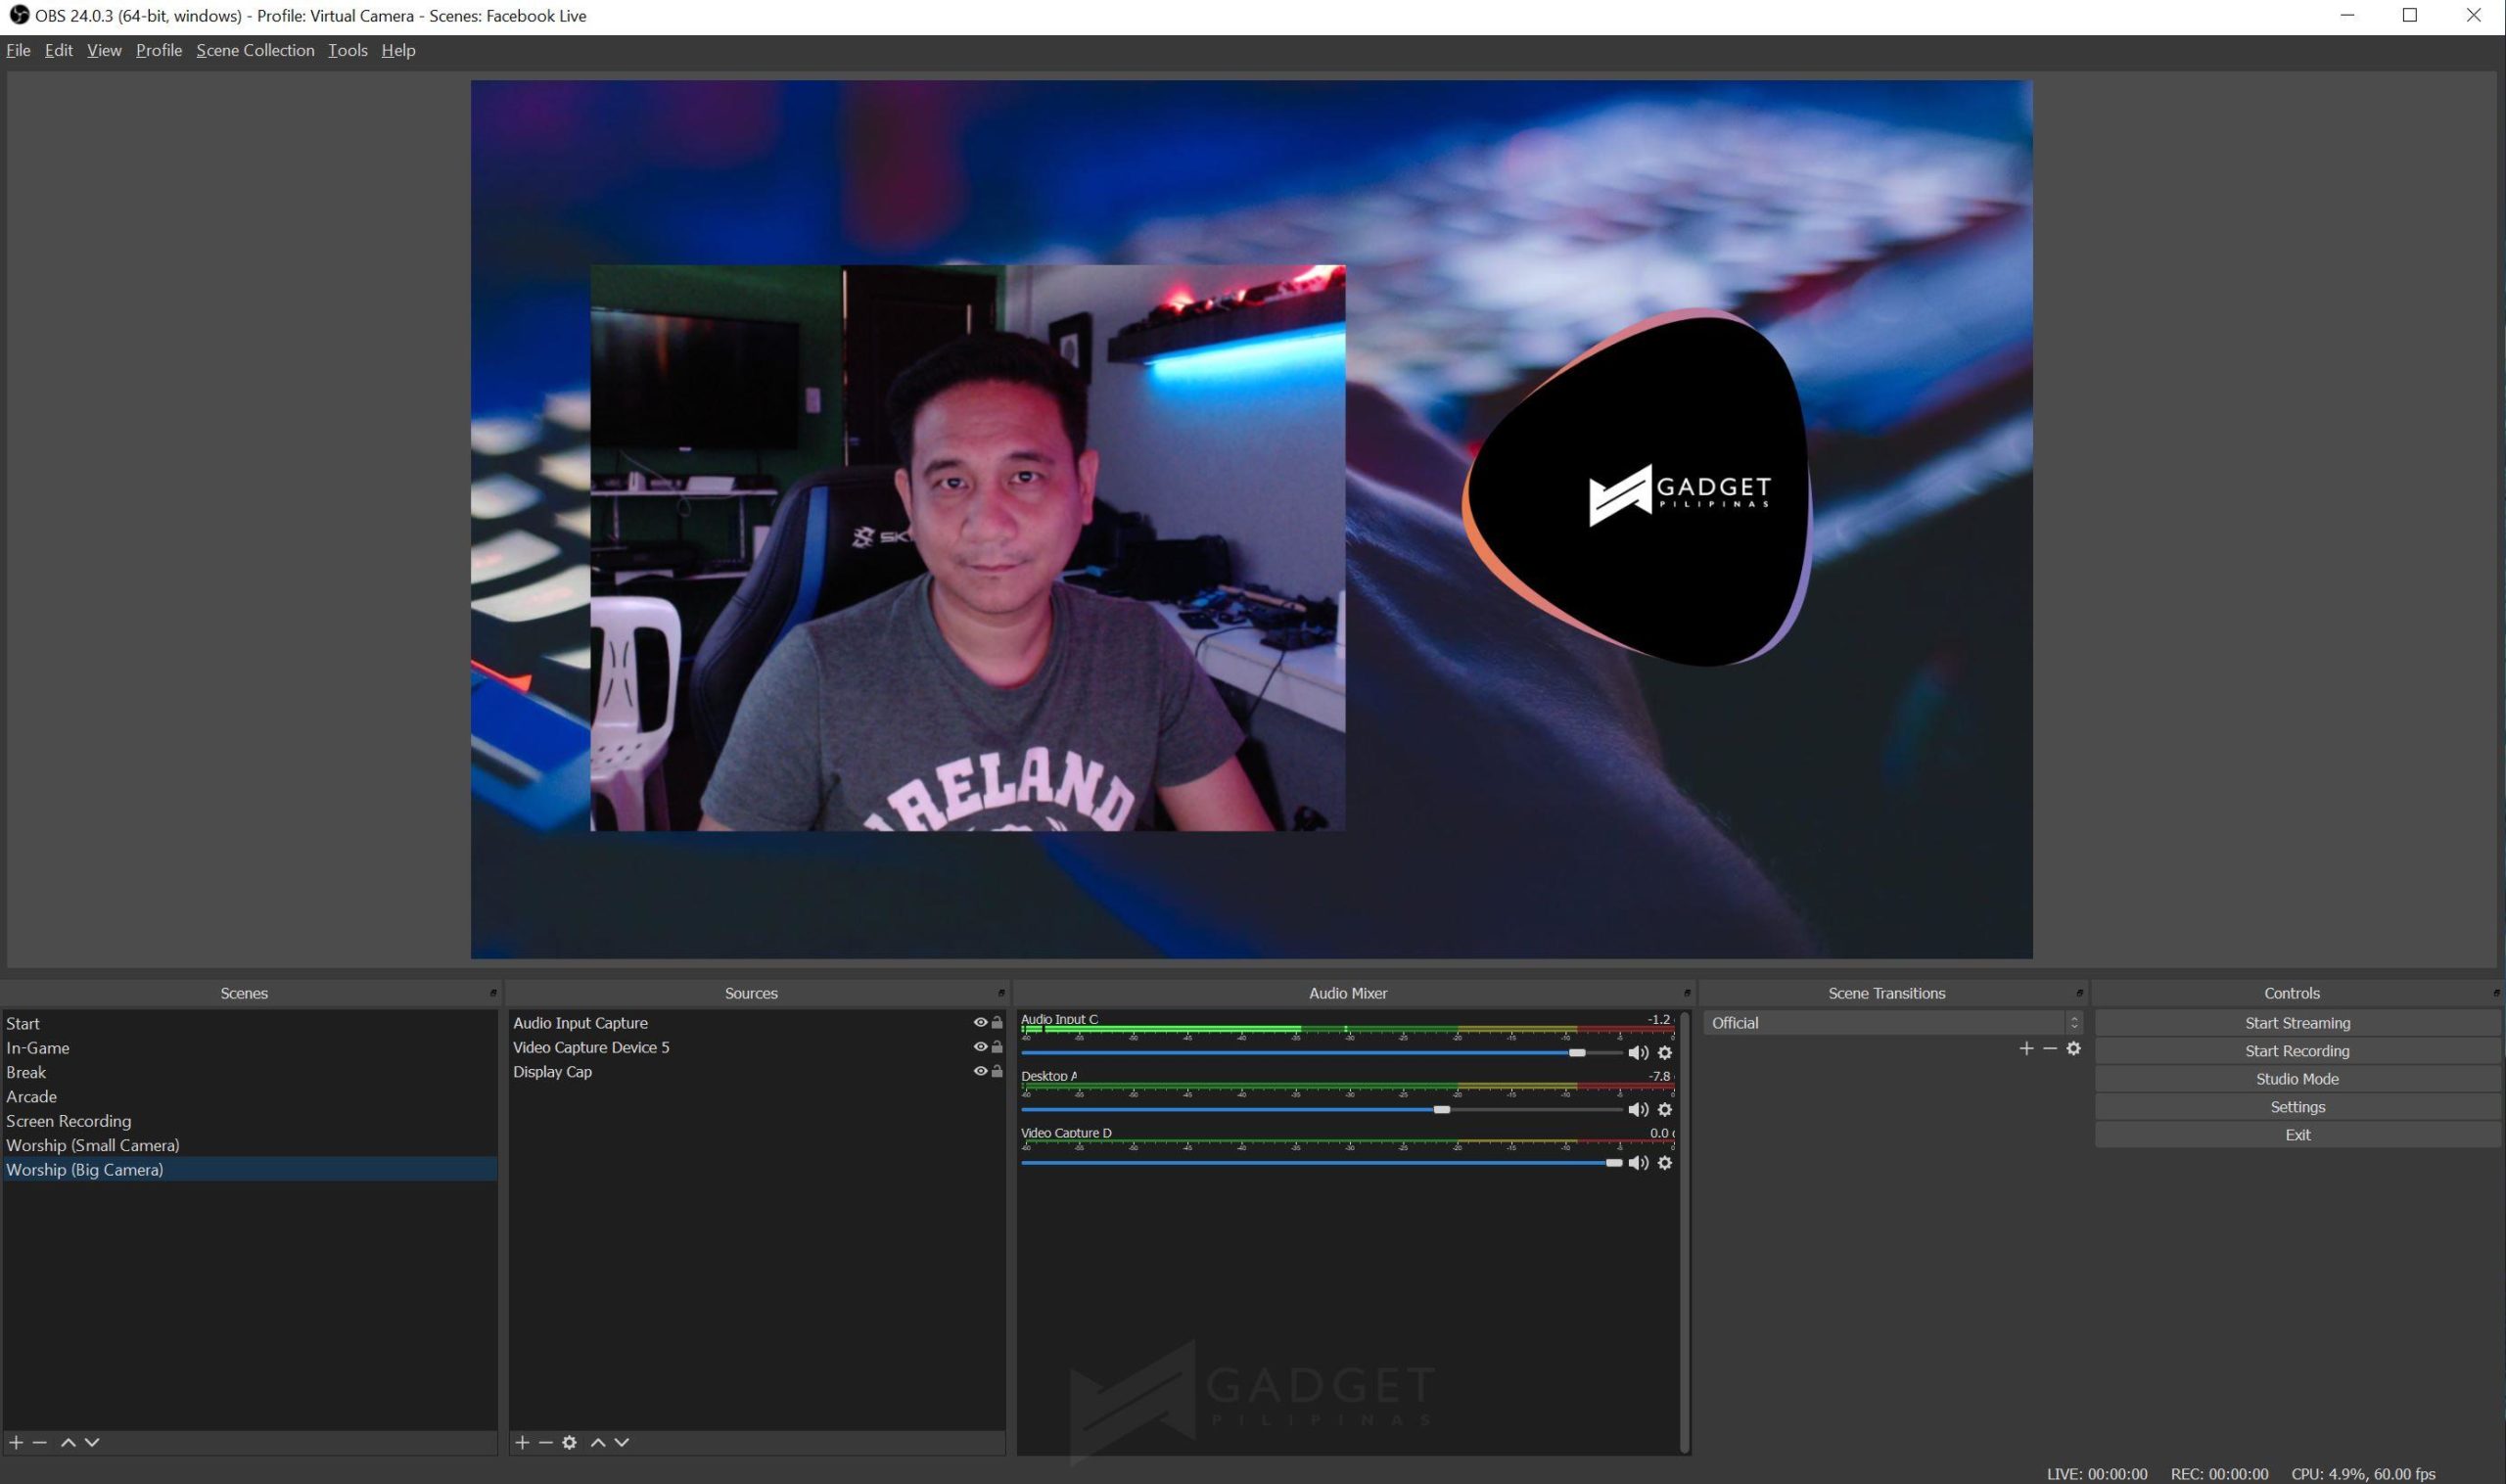
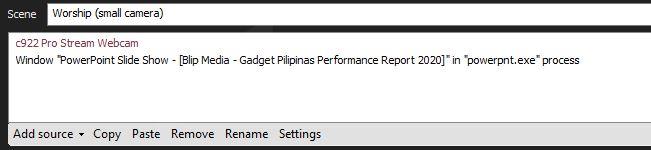
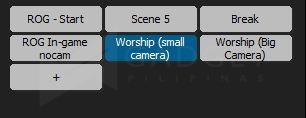
- In the sample below, I have 2 Scenes: Worship (Small Camera) and Worship (Big Camera). I can easily switch between two scenes with 2 different layout while streaming. Both sources include my Audio Input Capture (captures my microphone), Video Capture Device 5 (my camera) and Display Cap (captures my Microsoft PowerPoint Show Window).
- Go to Settings and click Stream.
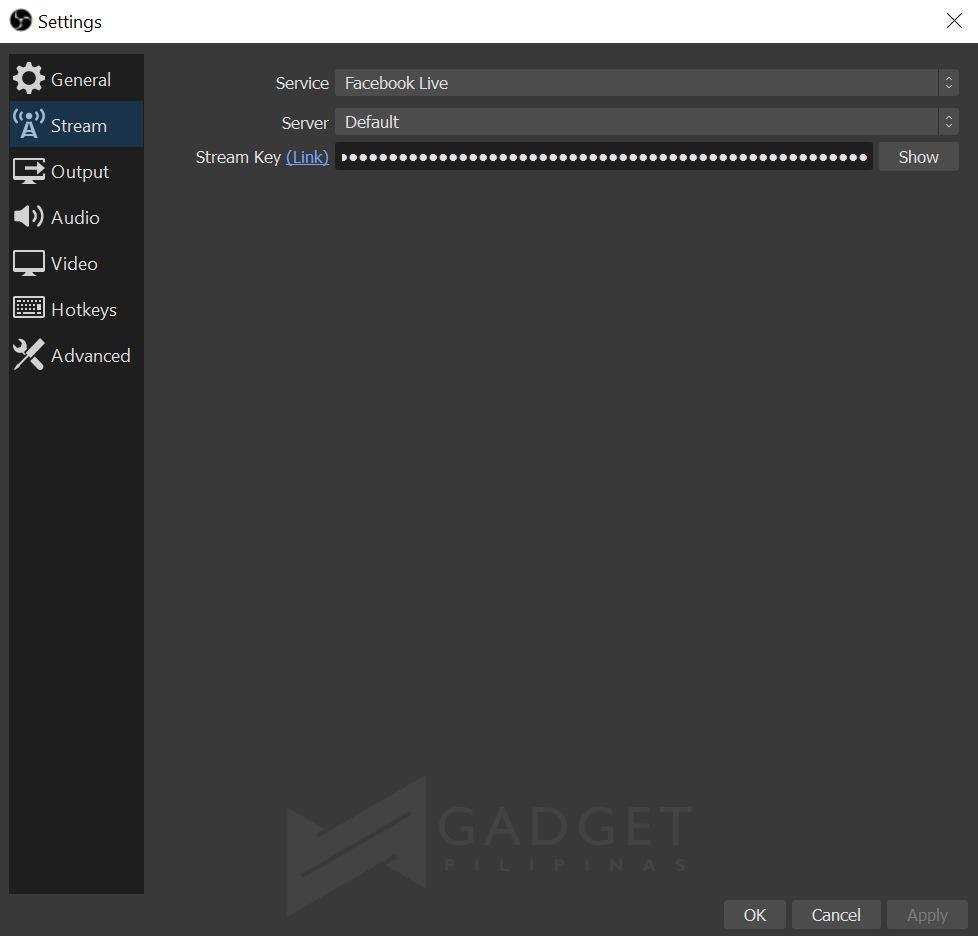
- One of my biggest issues with OBS is that you will need to set your stream settings manually. Xsplit Broadcasting is easier and more straightforward. Anyway, if you’re going to stream via Facebook Live, be sure to open your browser and go to this page: https://www.facebook.com/live/create. This will take you to Live Producer page of Facebook.
- Copy the Stream Key. Do not share this key to anyone you don’t trust. Don’t close this browser window just yet. We’ll go back to this later.
- Go back to OBS Studio and paste the Stream Key to the provided space. See the photo below. Your key will automatically be masked. You can click Show to verify if that key you pasted is the one you intended to paste.
- Go to Output. Depending on your internet speed, your Video Bitrate can go as high as 6500 on Facebook. The lower your bitrate gets, the lower the quality of your stream. Choose NVENC if you’re using a powerful GPU. Ignore other settings for now.
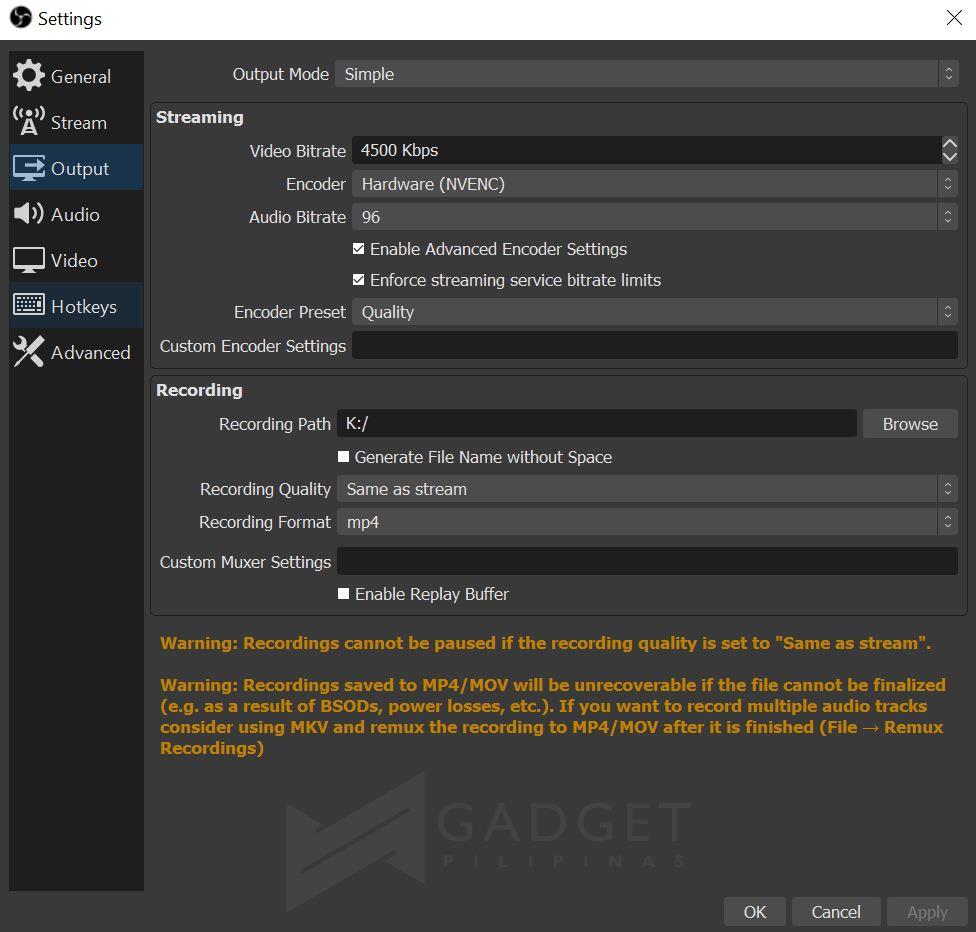
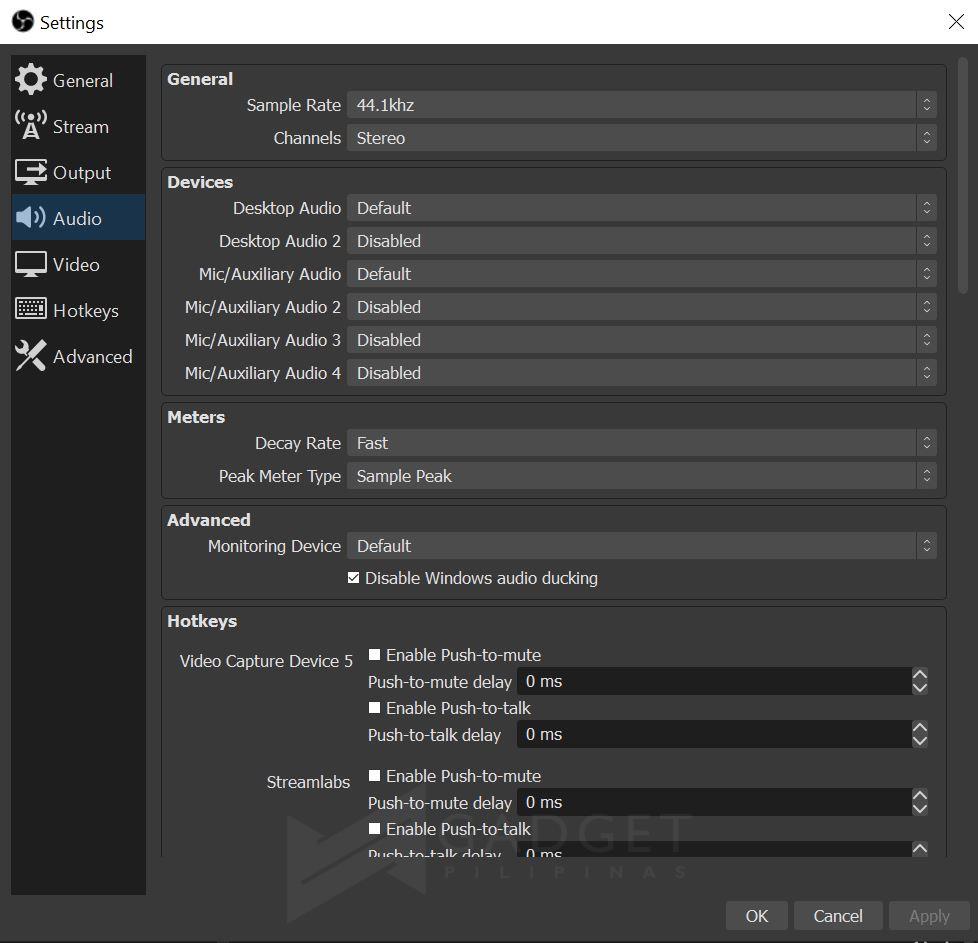
- Leave all Audio Settings at default for now.
- Go to Video Settings. Be sure to set both at 1920×1080. This, however, depends on your internet connection. If you’re not yet on Fiber, set your Output Resolion down to 720p or 480p. You can also decrease the Common FPS Values to 30fps from 60fps.

- When you’re ready, click “Start Streaming”, and you will notice that your Facebook Live Producer tab on your browser will now preview your stream. You are not yet actually live until you hit that Go Live button.
- When you’re ready, click Go Live.
- Be sure to switch between Scenes as needed.
- If you want to stop streaming, go to Live Producer, and click Stop Streaming; and then go back to OBS Studio and do the same thing.
If you want an easier way to set things up, you may check out Xsplit Broadcaster. Everything’s pretty straightforward as you only just need to sign-up, download the app and sign-in. It’s a paid service though so you may need to subscribe to it as you see fit. The logic of setting everything up is pretty much the same with OBS Studio, but it’s far easier to comprehend and automated.
Streaming with Xsplit Broadcaster
- Download Xsplit Broadcaster in this link.
- Fire up Xsplit Broadcaster. The application will take you through linking your app to your platform of choice, whether it’s Facebook or YouTube. It’s pretty straightforward, and all you need to do is to just sign in and follow instructions. You can also choose to skip streaming and just record everything to your hard drive. If everything is fully set up, it’s time to prepare your Scenes and Sources.
- Streaming Tutorial 34
- Streaming Tutorial 35
- Prepare a scene and include all the necessary sources in it with the following order (top to botttom): Widget (optional), Camera, Window.
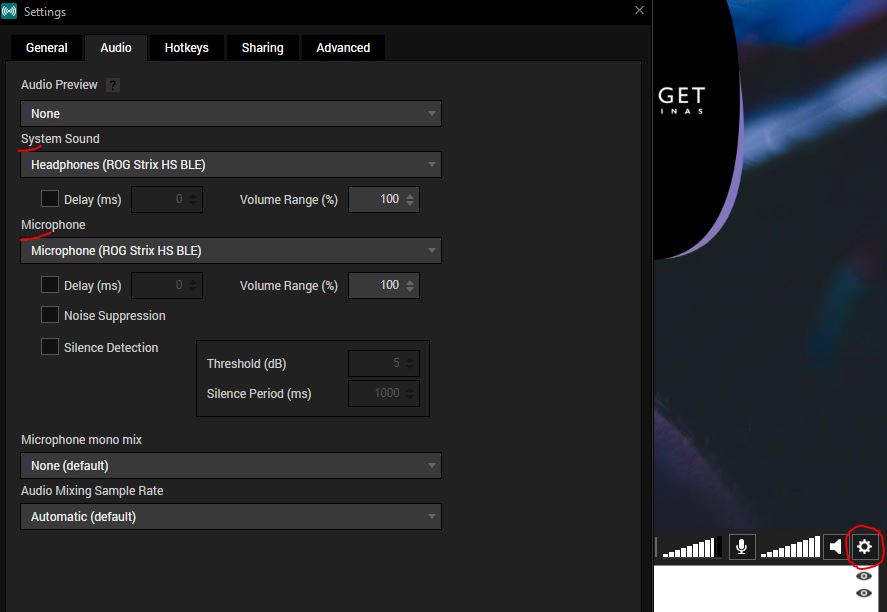
- The audio setup is the settings section. Click the cog icon and you’ll see the settings similar to screenshot below.
- In the sample below, I have 2 Scenes: Worship (Small Camera) and Worship (Big Camera). I can easily switch between two scenes with 2 different layout while streaming on the right panel of Xsplit Broadcaster. Both sources my C922 Webcam and the PowerPoint slide sample.
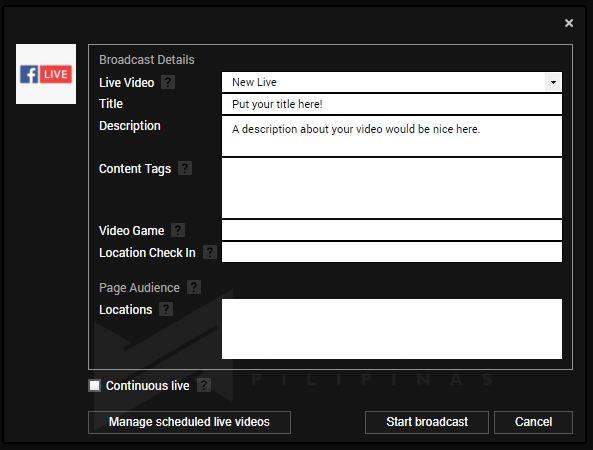
- Go to menus, click Broadcast, and choose the platform you want. Put descriptions about your video and click START BROADCAST.
- Be sure to switch between Scenes as needed.
- If you want to stop streaming, go to Live Producer, and click Stop Streaming; and then go back to OBS Studio and do the same thing.
With the use of available technology, you can still continue and fulfill your vocation. While we’re not underplaying this huge concern we’re all in, let us all remain faithful and hopeful for the good things that are about to come.
If you have any questions and you work in the education or worship ministry, we’d love to help you as part of our vocation. You may contact me via email – [email protected] and ask your questions. I’d be happy to sit down and help you the best way I can.

Giancarlo Viterbo is a Filipino Technology Journalist, blogger and Editor of gadgetpilipinas.net, He is also a Geek, Dad and a Husband. He knows a lot about washing the dishes, doing some errands and following instructions from his boss on his day job. Follow him on twitter: @gianviterbo and @gadgetpilipinas.