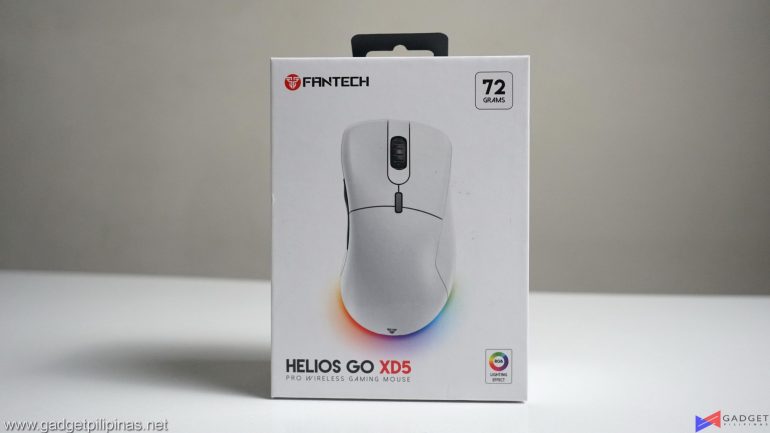
The way Fantech has been in recent years has been nothing but astonishing with its product releases in the gaming peripheral market. The company has grown from an entry-level peripheral brand to having one of the best budget gaming gear that enthusiasts appreciate. Today, we will be checking out Fantech’s latest product under the Helios line, the Fantech Helios Go XD5 Gaming Mouse.
Fantech Helios Go XD5 Mouse Specs
| Sensor | Pixart 3370 |
|---|---|
| Resolution | 50-19,000 DPI |
| IPS | 400 |
| Acceleration | 50G |
| Polling Rate | 1000Hz |
| Switch Type | Kailh8.0 80 Million Clicks |
| Total Buttons | 6 |
| Shape | Ergonomic, Right-handed |
| Illumination | Running RGB with 7 RGB modes |
| Size | 120*64*40mm |
| Weight | 72g w/o cable |
| Software | Yes |
| On-board Memory | Yes |
| Cable Material | Paracord Cable |
Unboxing and First Impression
- Fantech Helios XD5 Gaming Mouse Review 108
- Fantech Helios XD5 Gaming Mouse Review 108
- Fantech Helios XD5 Gaming Mouse Review 103
- Fantech Helios XD5 Gaming Mouse Review 103
Fantech’s choice to go with an all-white packaging definitely makes the brand and the product feel more premium as there are fewer products sporting white packaging let alone a clean design like the Helios Go XD5.
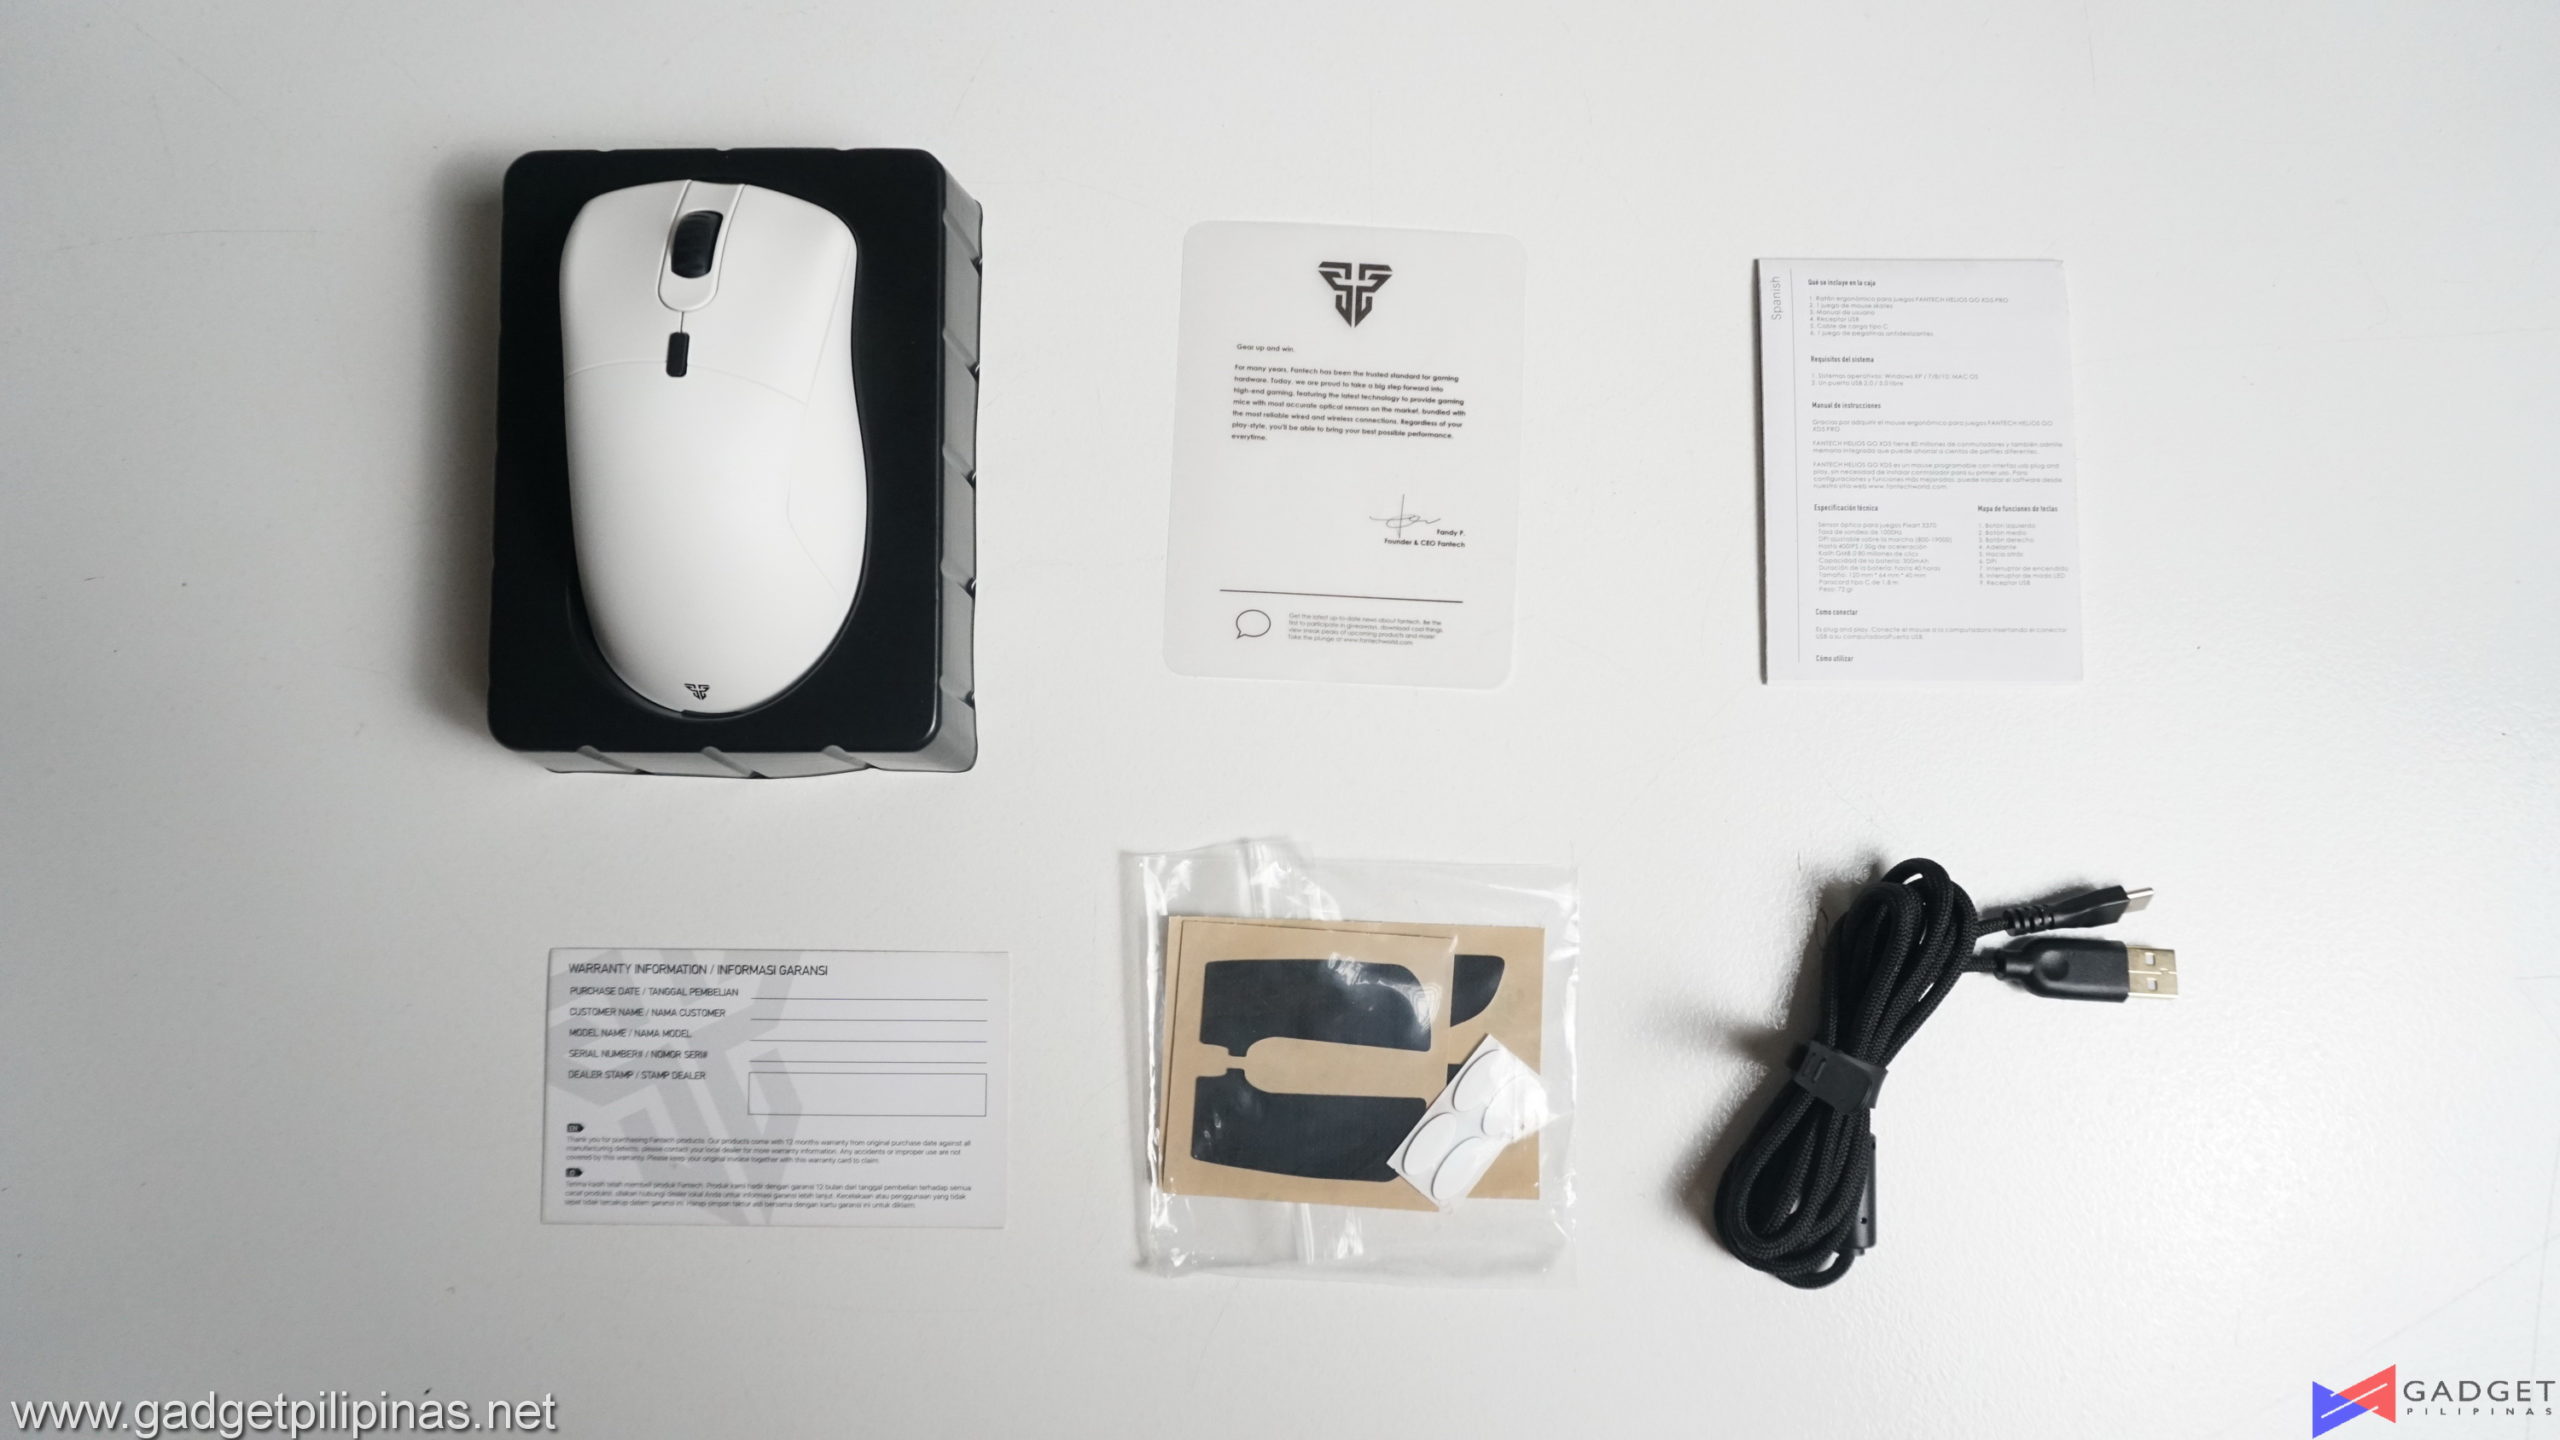 Packaging Contents
- Fantech Helios Go XD5
- Warranty Card
- CEO’s note
- Manual
- Extra PTFE Mouse Feet
- USB-C Paracord Charging Cable
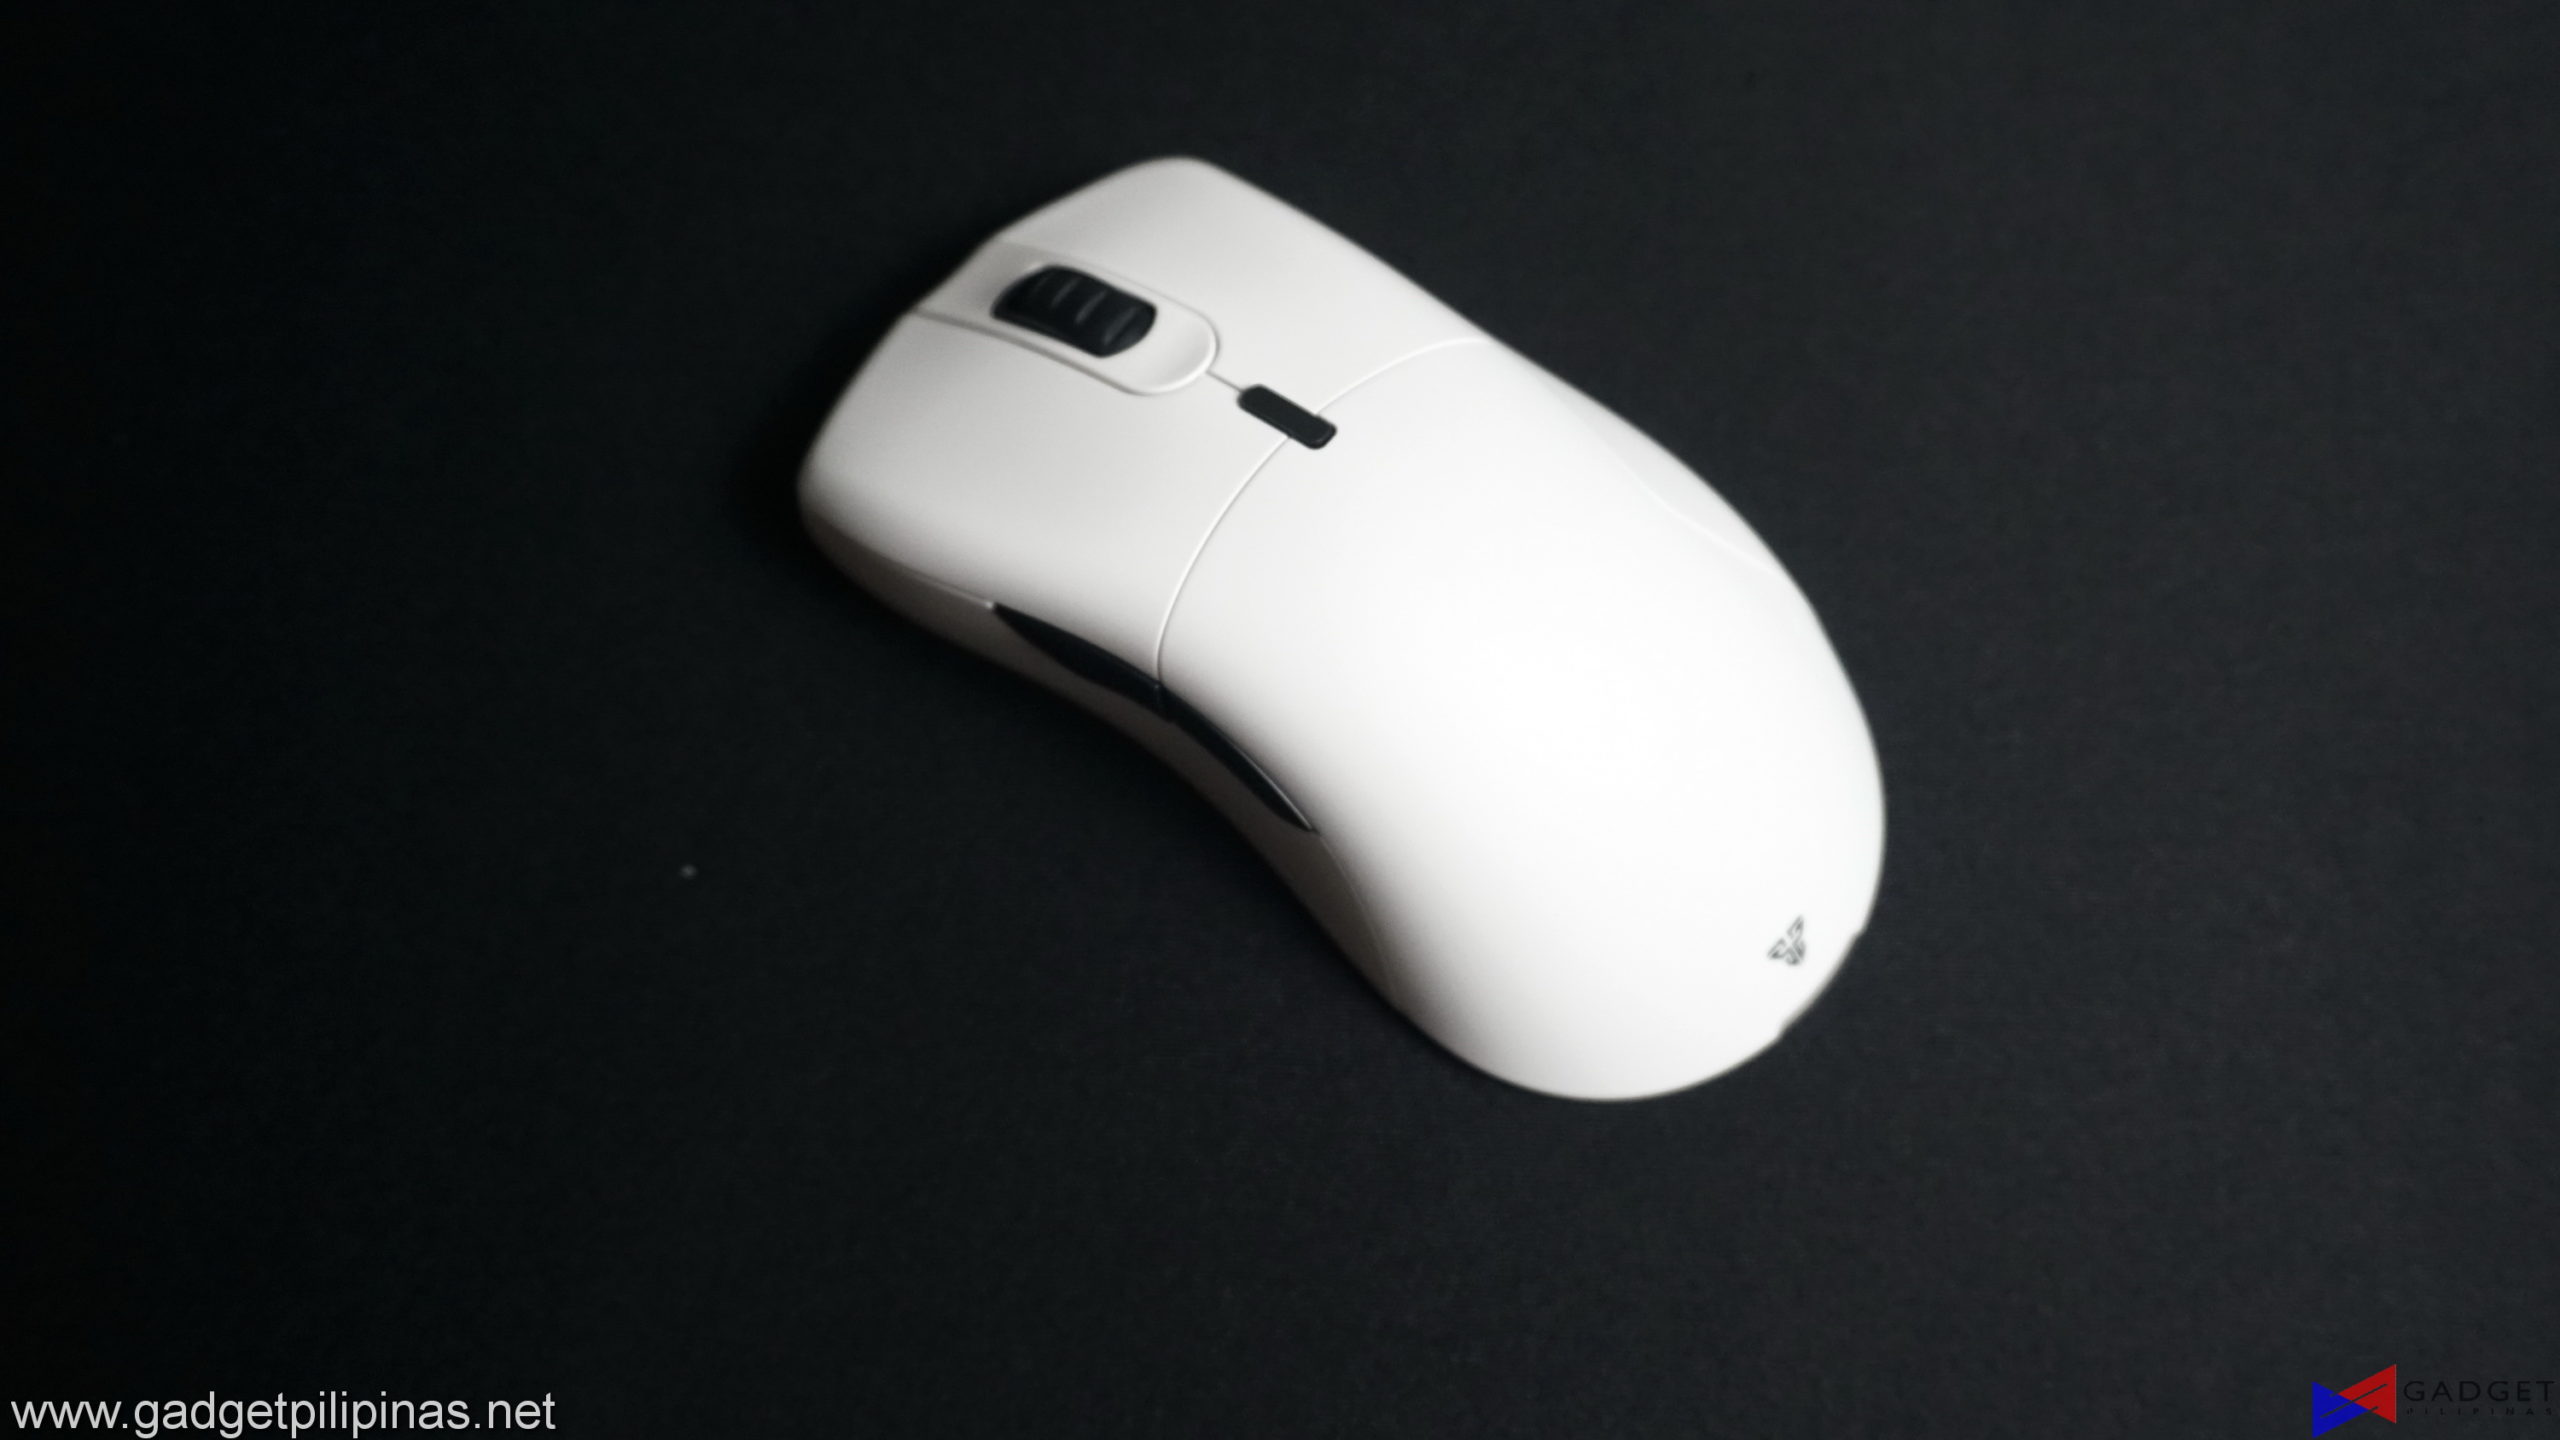 Unlike the Fantech Helios XD3 which sports an ambidextrous design, the Fantech Helios Go XD5 has an ergonomic design similar to that of the popular Zowie EC2 series albeit in a much smaller form factors. Taking a closer look at the mouse, we can say that the Fantech Helios XD5 is heavily inspired by the OG Microsoft Intellimouse with its ergonomic shape.
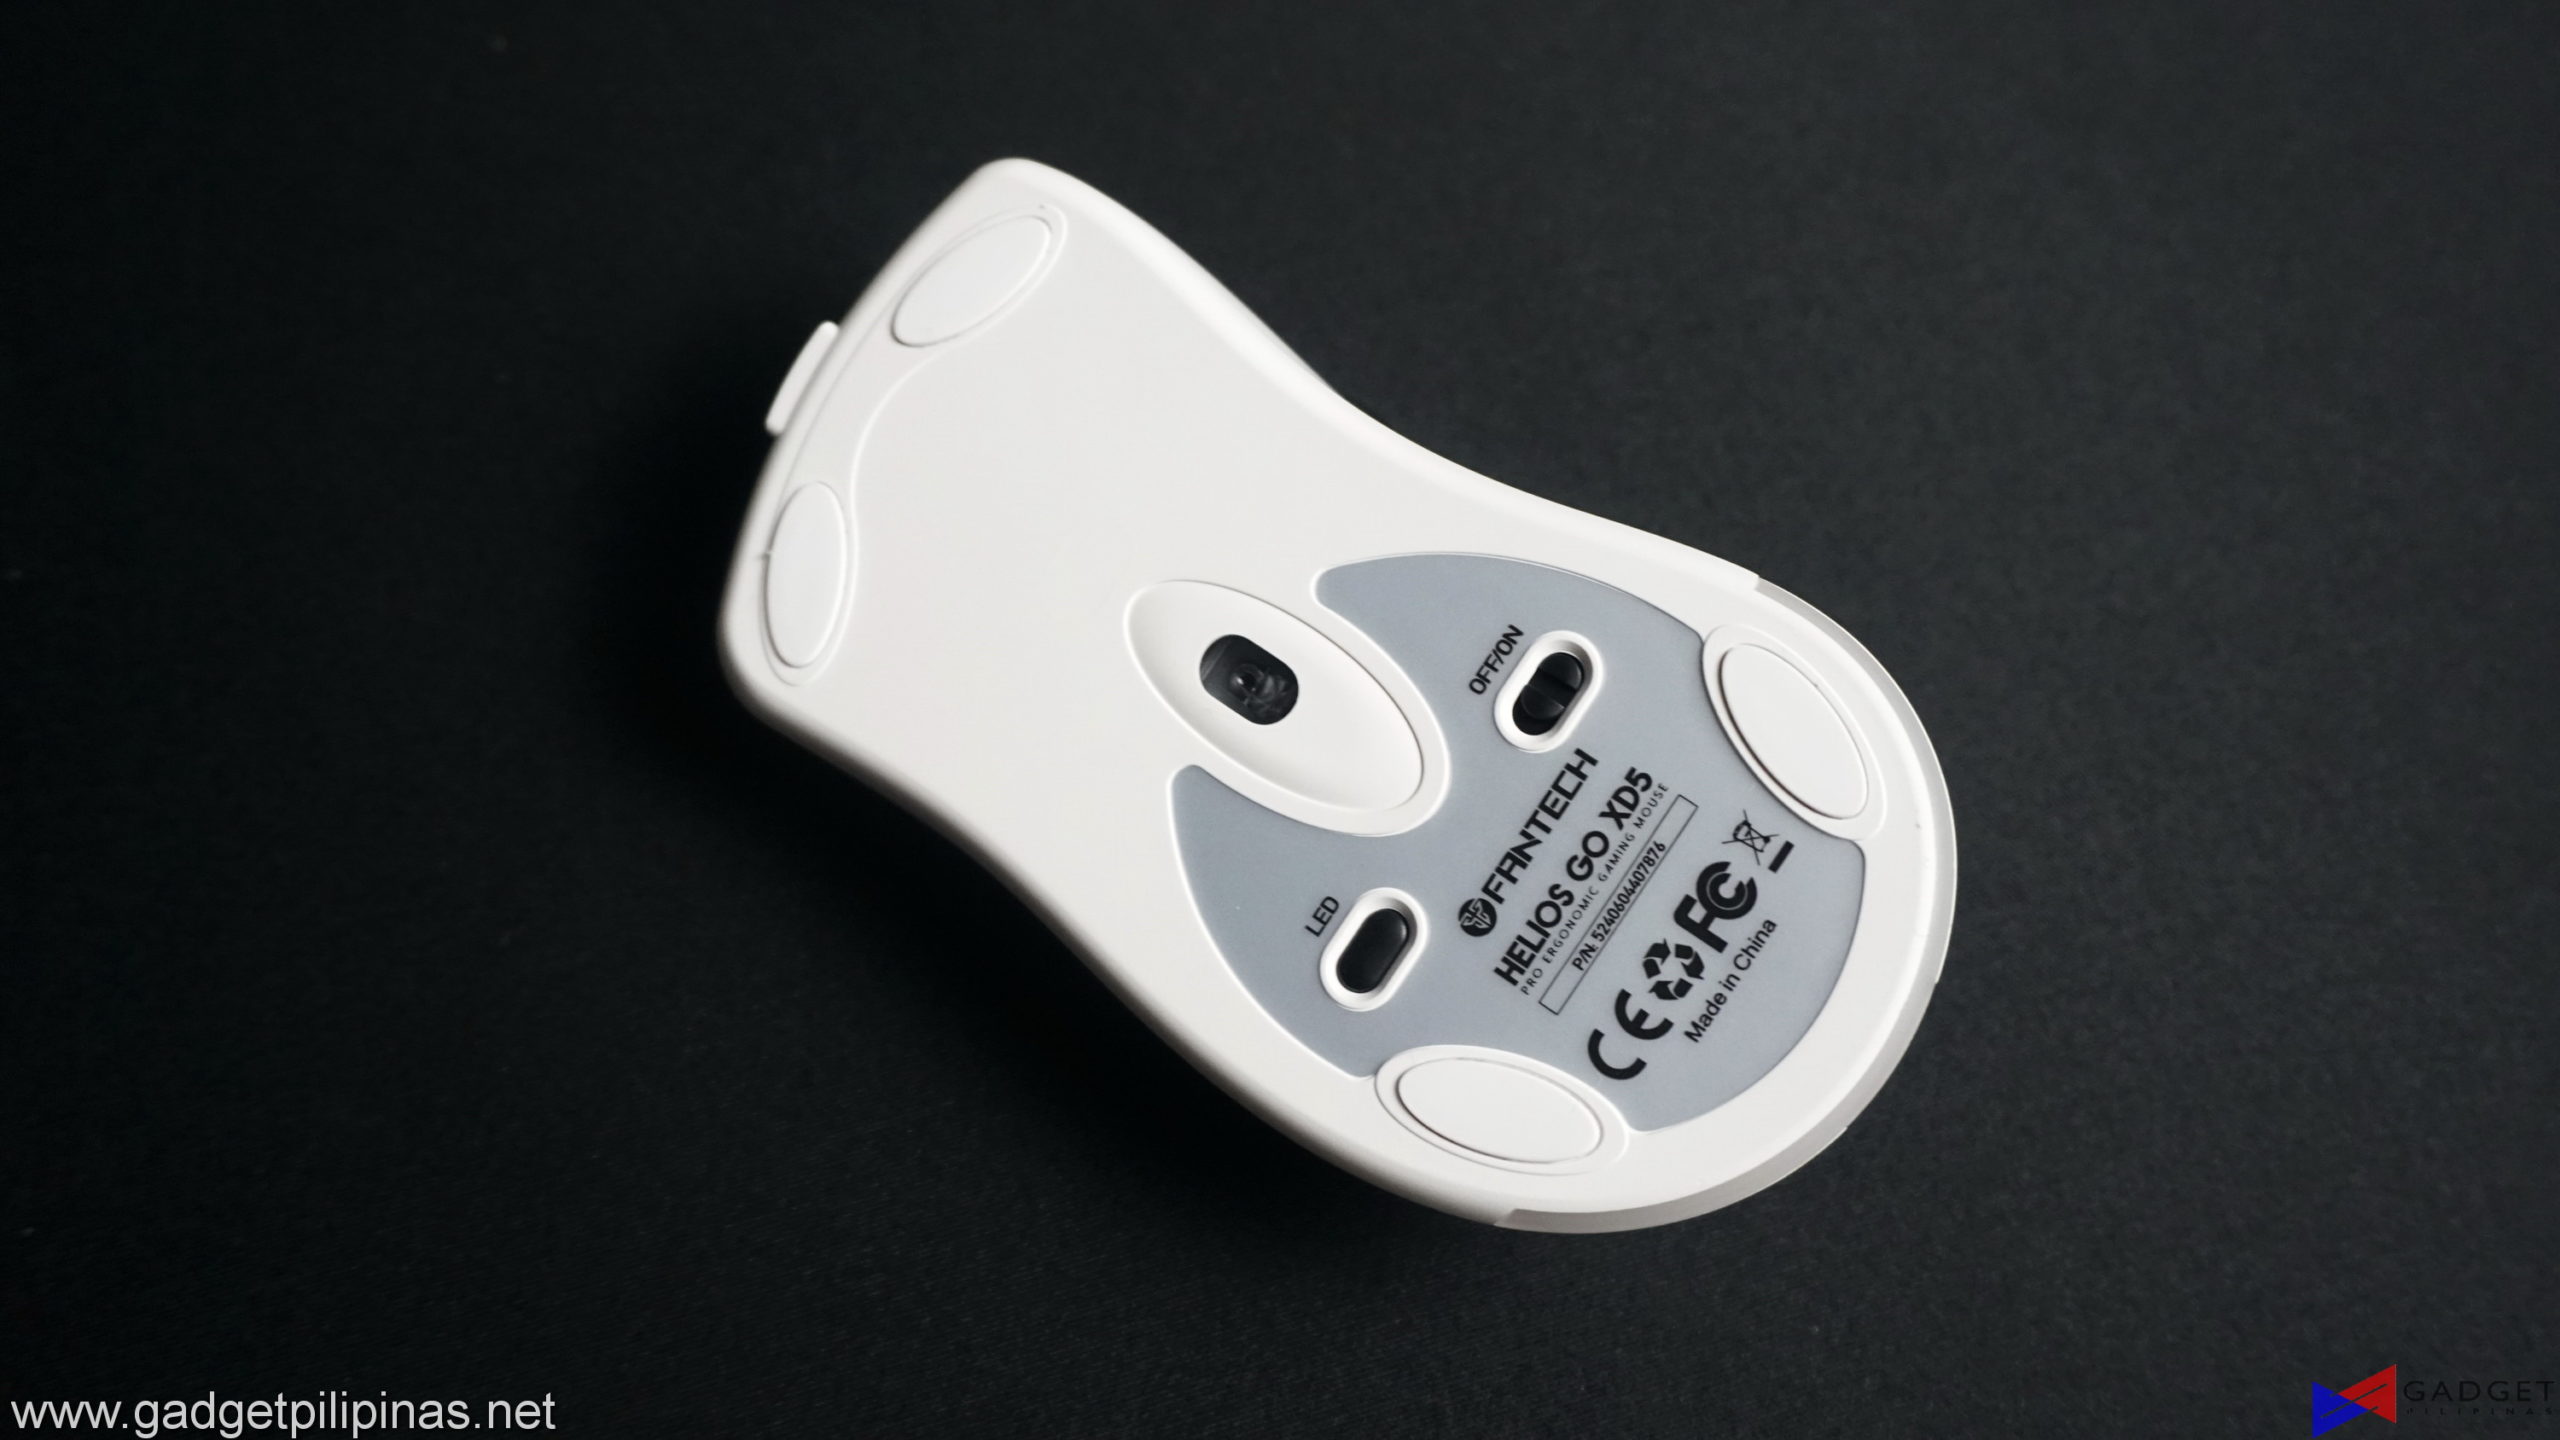 The Fantech Helios Go XD5, uses an updated and more efficient version of the Helios XD3’s PixArt 3335 sensor, the PixArt 3370. The PixArt 3370 has overall better sensor performance with DPI levels up to 19,000 DPI. The back of the mouse shows the ON/OFF switch toggle as well as an LED button to cycle through effects or turn of the RGB lighting completely. Additionally, there’s a total of 5 PTFE mouse feet installed on the Helios GO XD5.
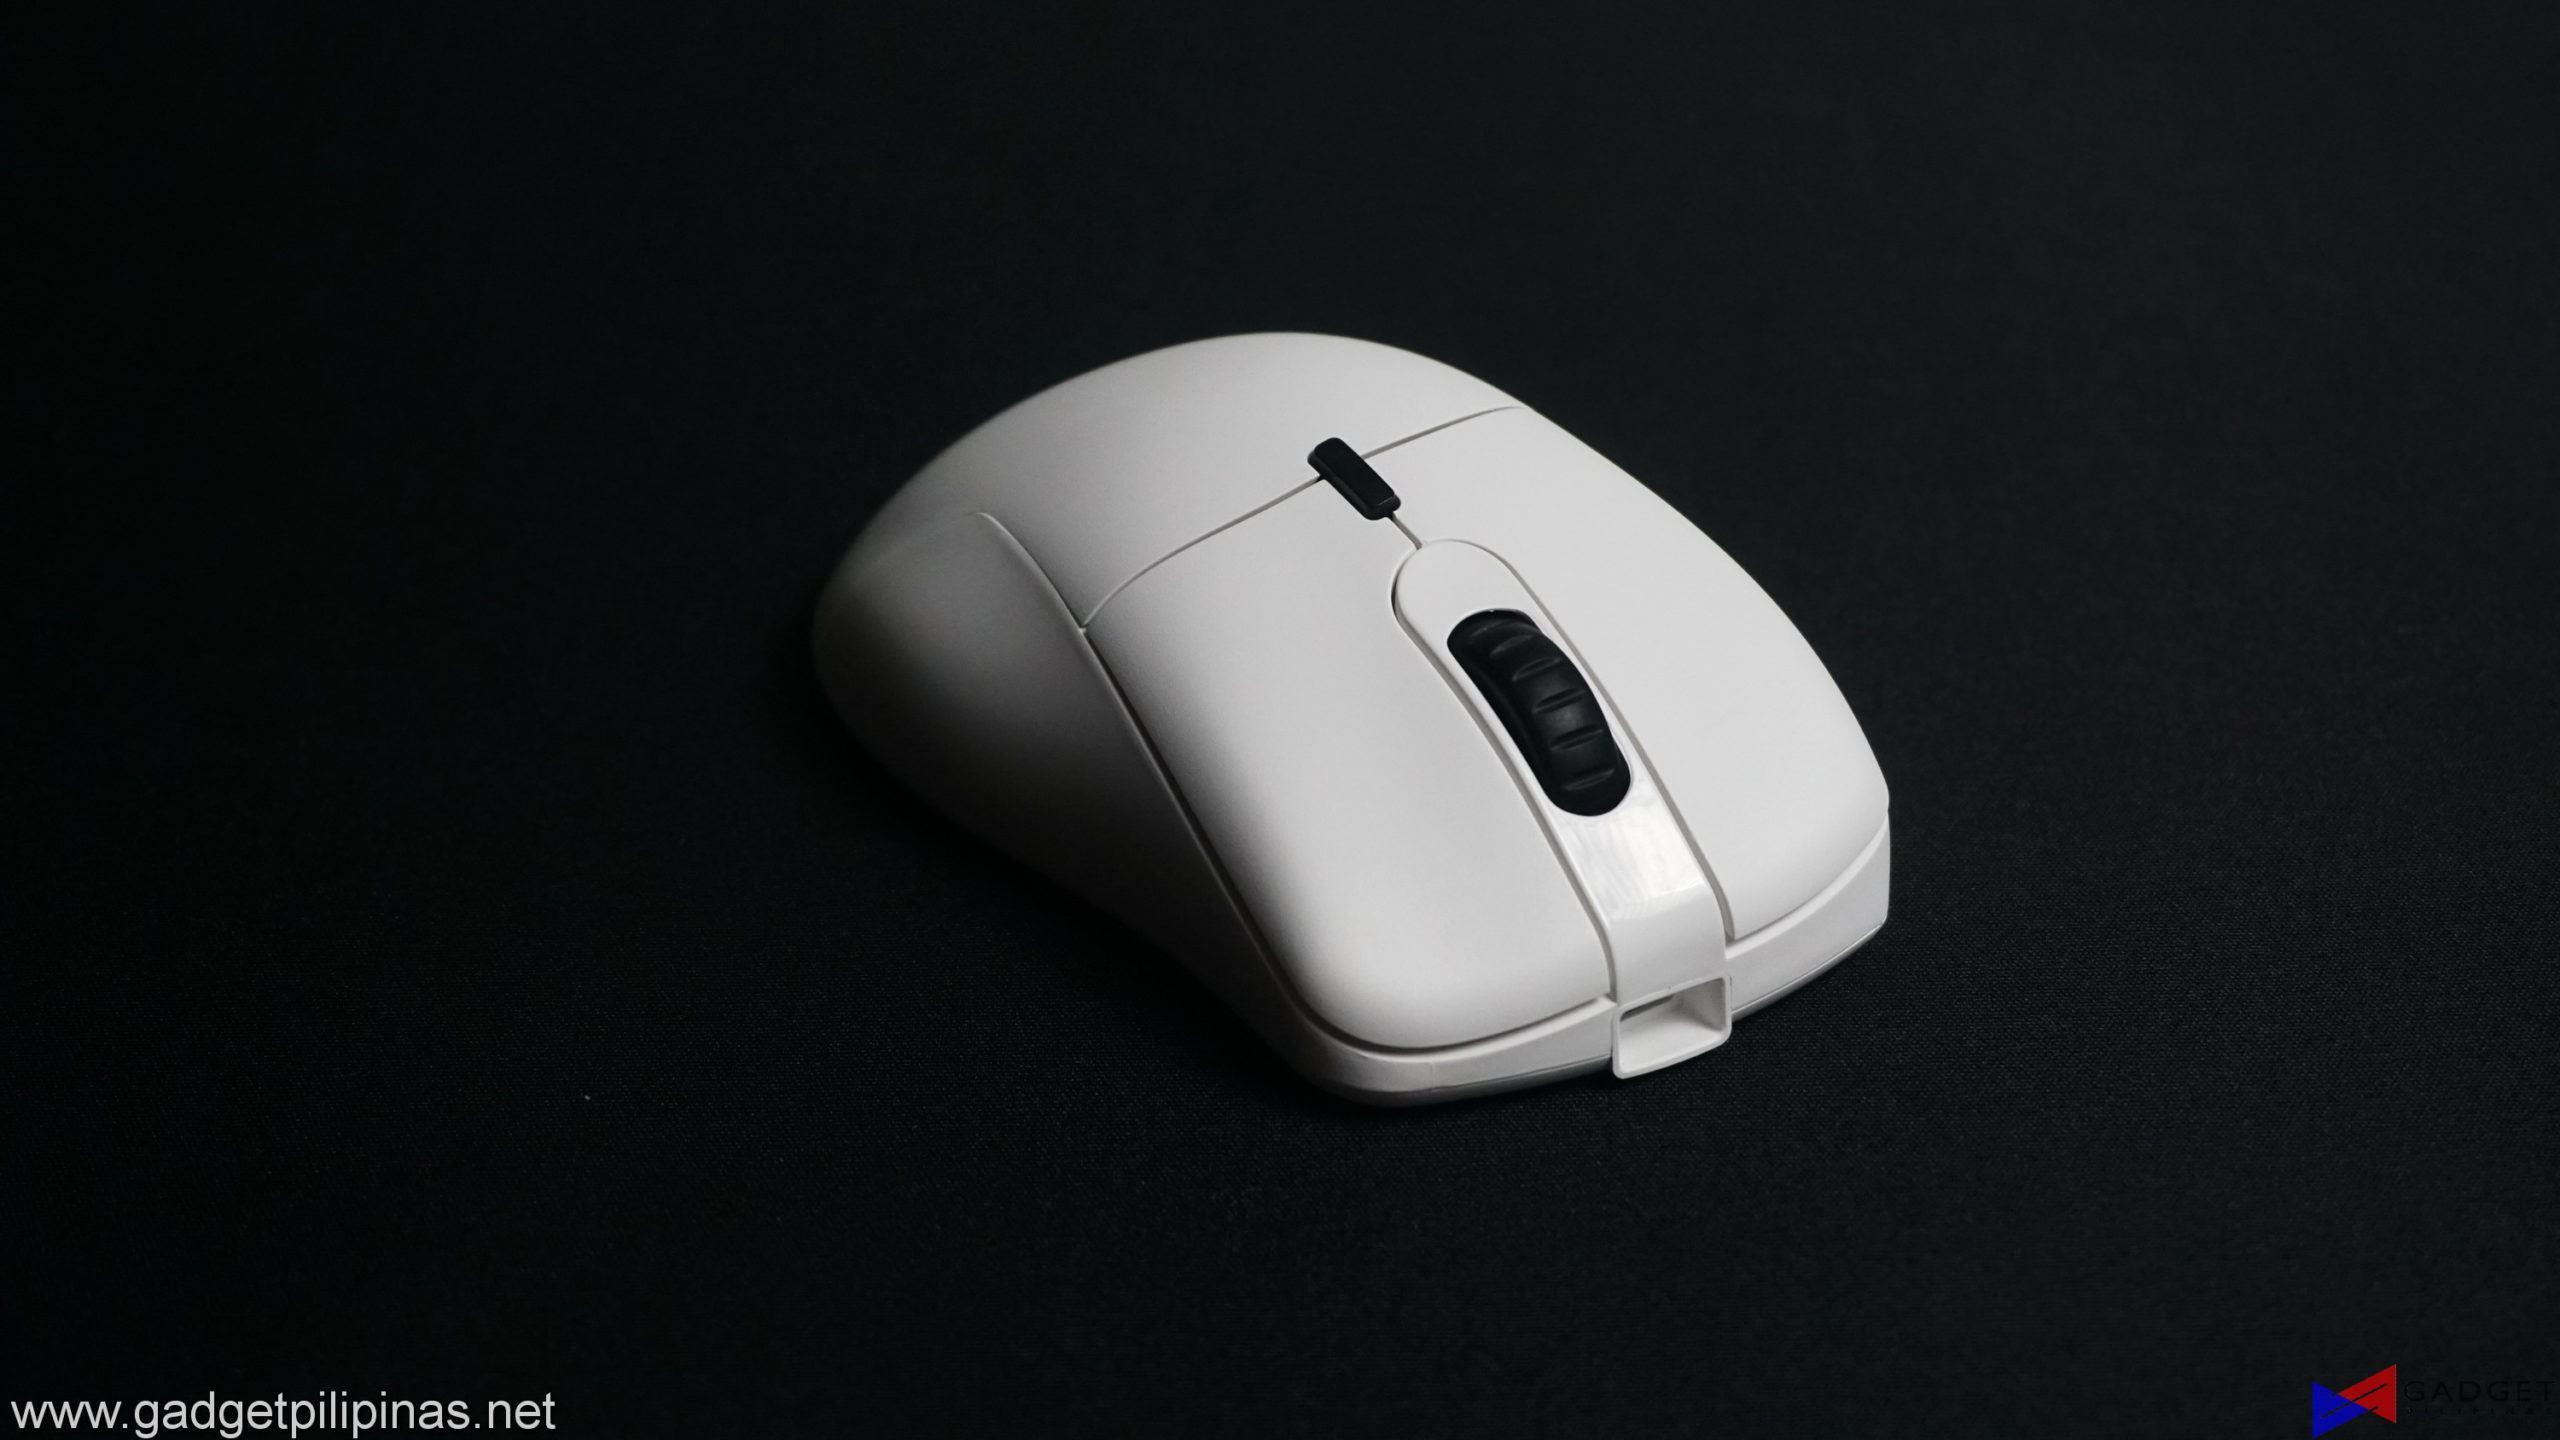 One change I deeply admire about the Helios Go XD5 over the Helios XD3 is the switches. Instead of using the same Huano switches found on the XD3, Fantech swapped the XD5’s with Kailh GM8.0 switches which have more pronounced tactile feedback and are less stiff.
- Fantech Helios Go XD5 Mouse Review 033
- Fantech Helios Go XD5 Mouse Review 033
- Fantech Helios Go XD5 Mouse Review 036
- Fantech Helios Go XD5 Mouse Review 036
As for the side buttons, the ones of the Fantech Helios Go XD5 are definitely much larger and have a different set of switches which are more clicky but requires a bit more travel time. The front-side button is easily accessible thanks to the bump of the buttons mold itself, while the back one is definitely harder to navigate through as I need to stretch or push back my thumb way longer than I’d like making it less ergonomic for my hybrid-claw grip. That said, I would’ve preferred the shape of the XD3’s side buttons but with the switches of XD5.
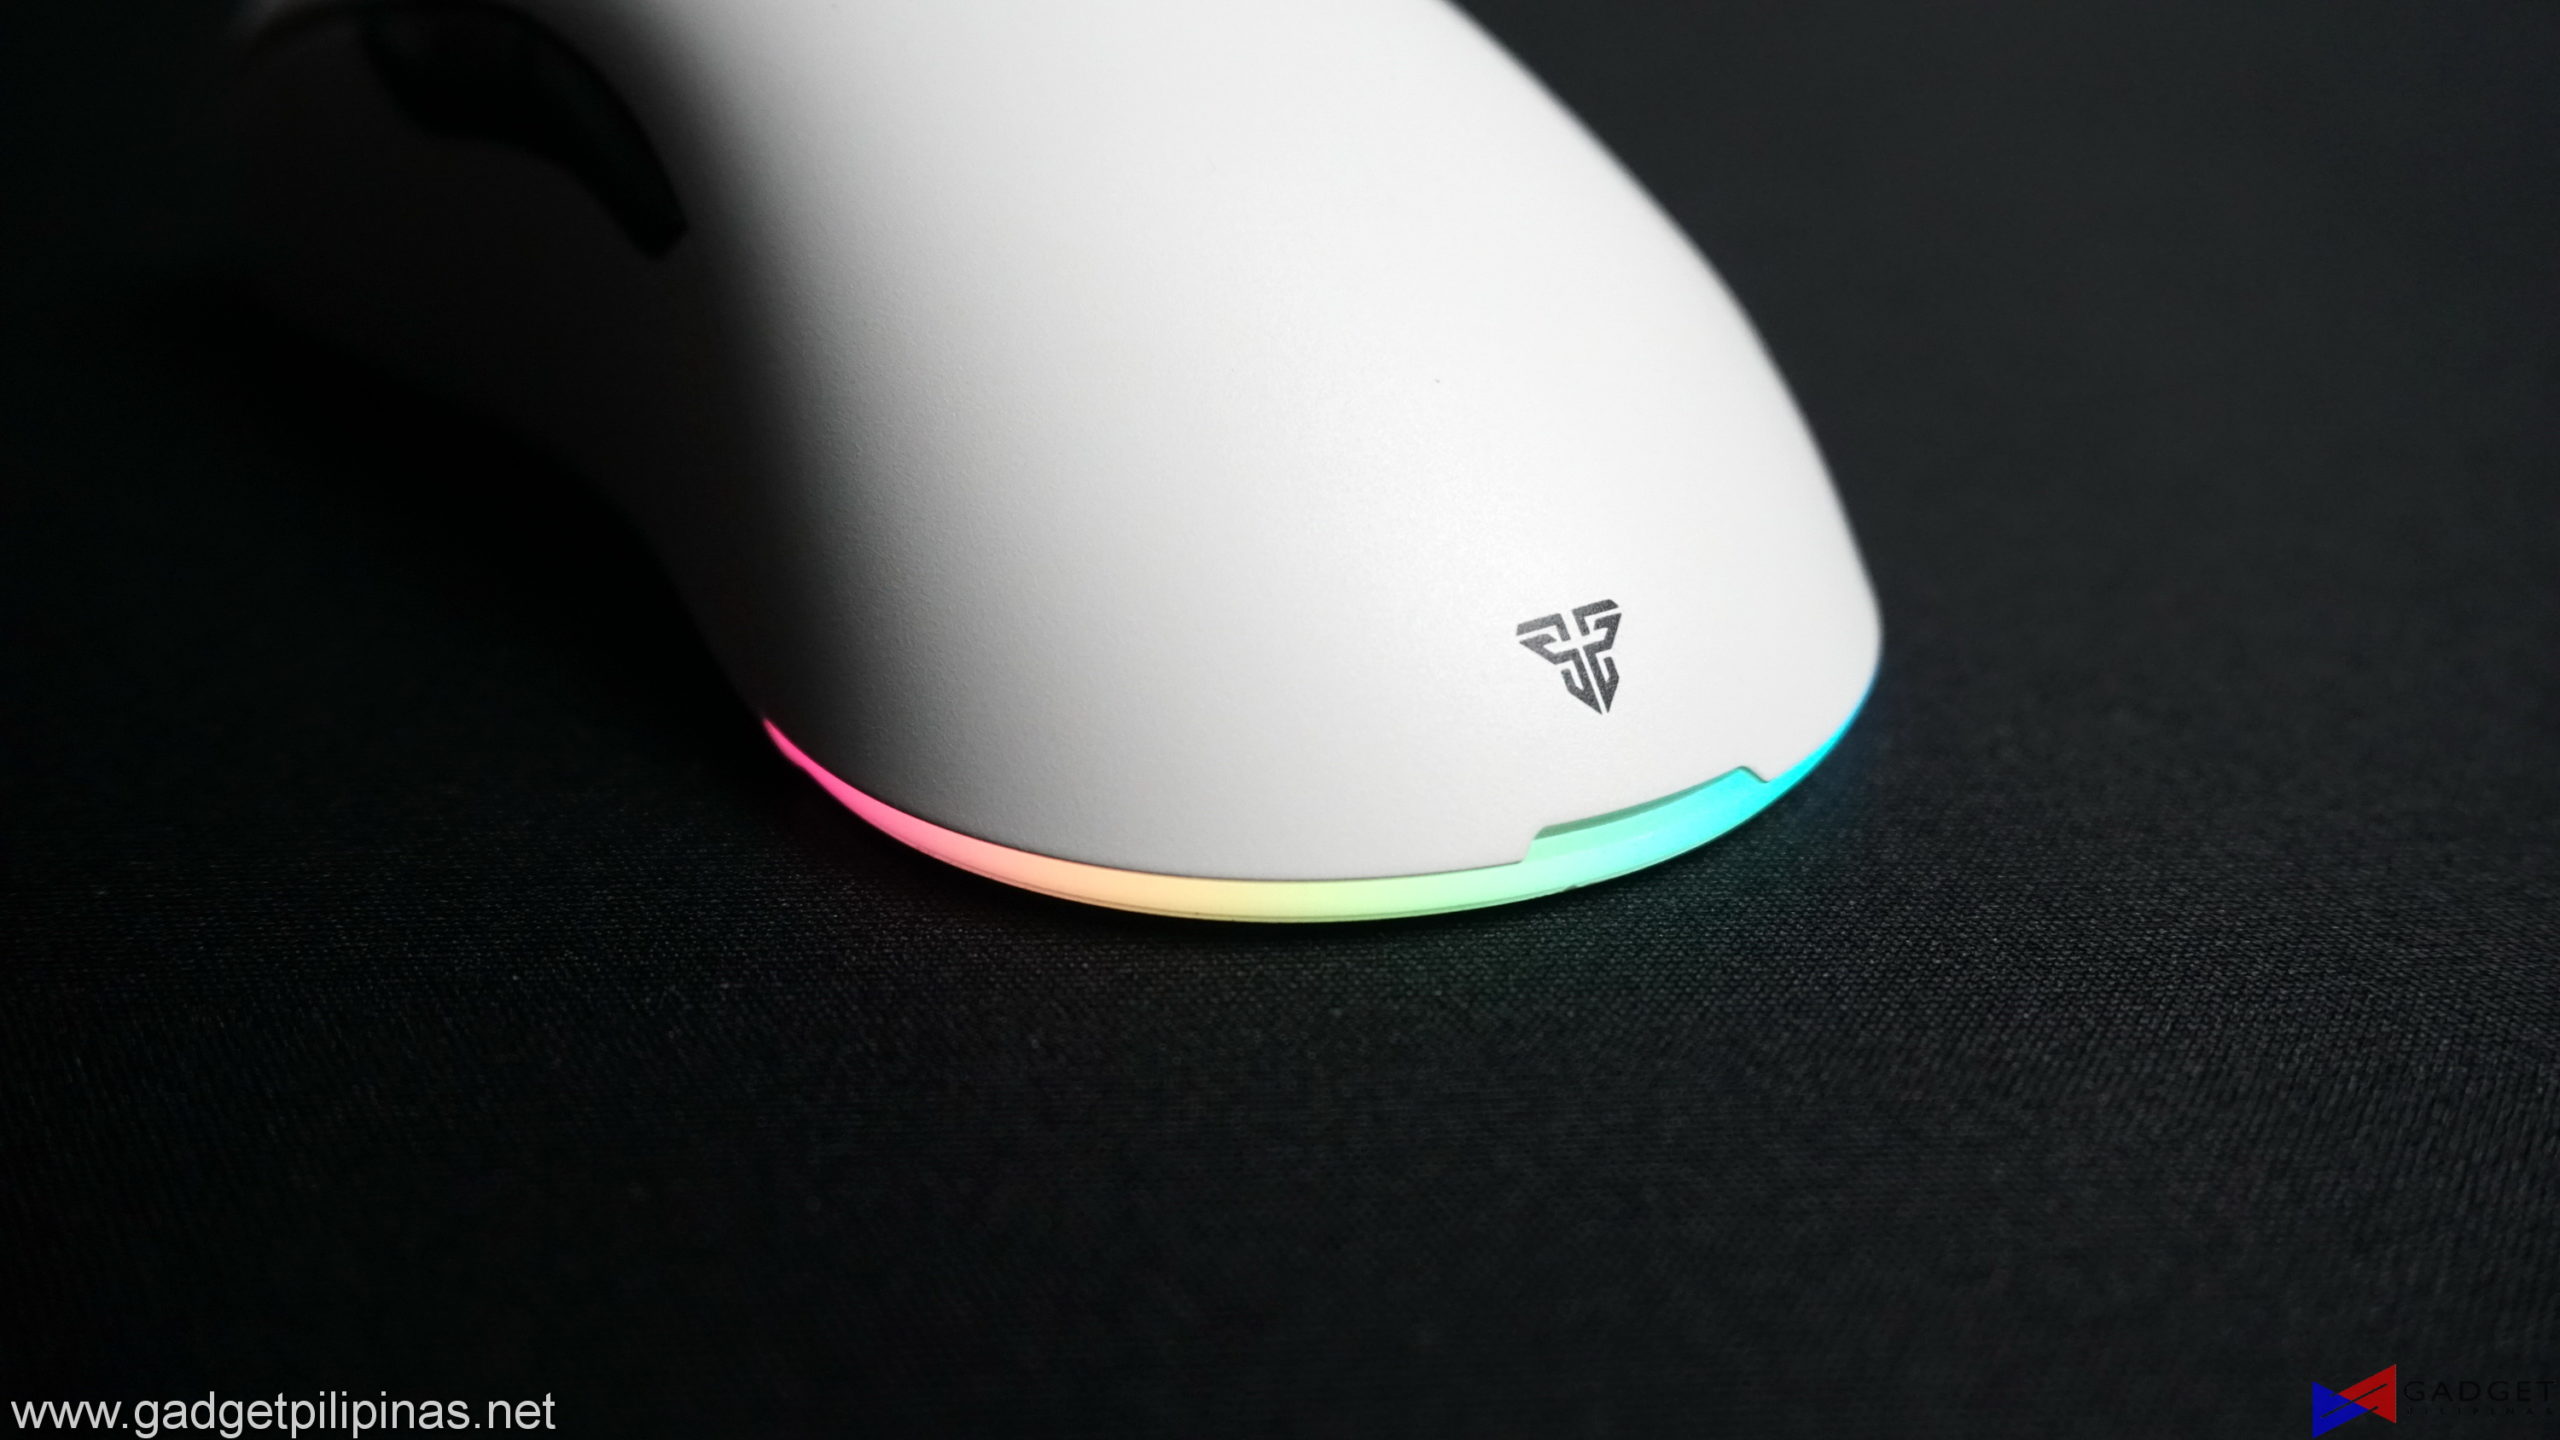 RGB lighting on the Helios Go XD5 is subtle which definitely makes it feel premium thanks to the diffused design and placement. Like the XD3, the RGB lighting can be controlled via Fantech’s software. The non RGB logo that shrunked and is placed all the way to the bottom is a very much welcomed change as it definitely cleans up the mouse’s aesthetic making it look premium.
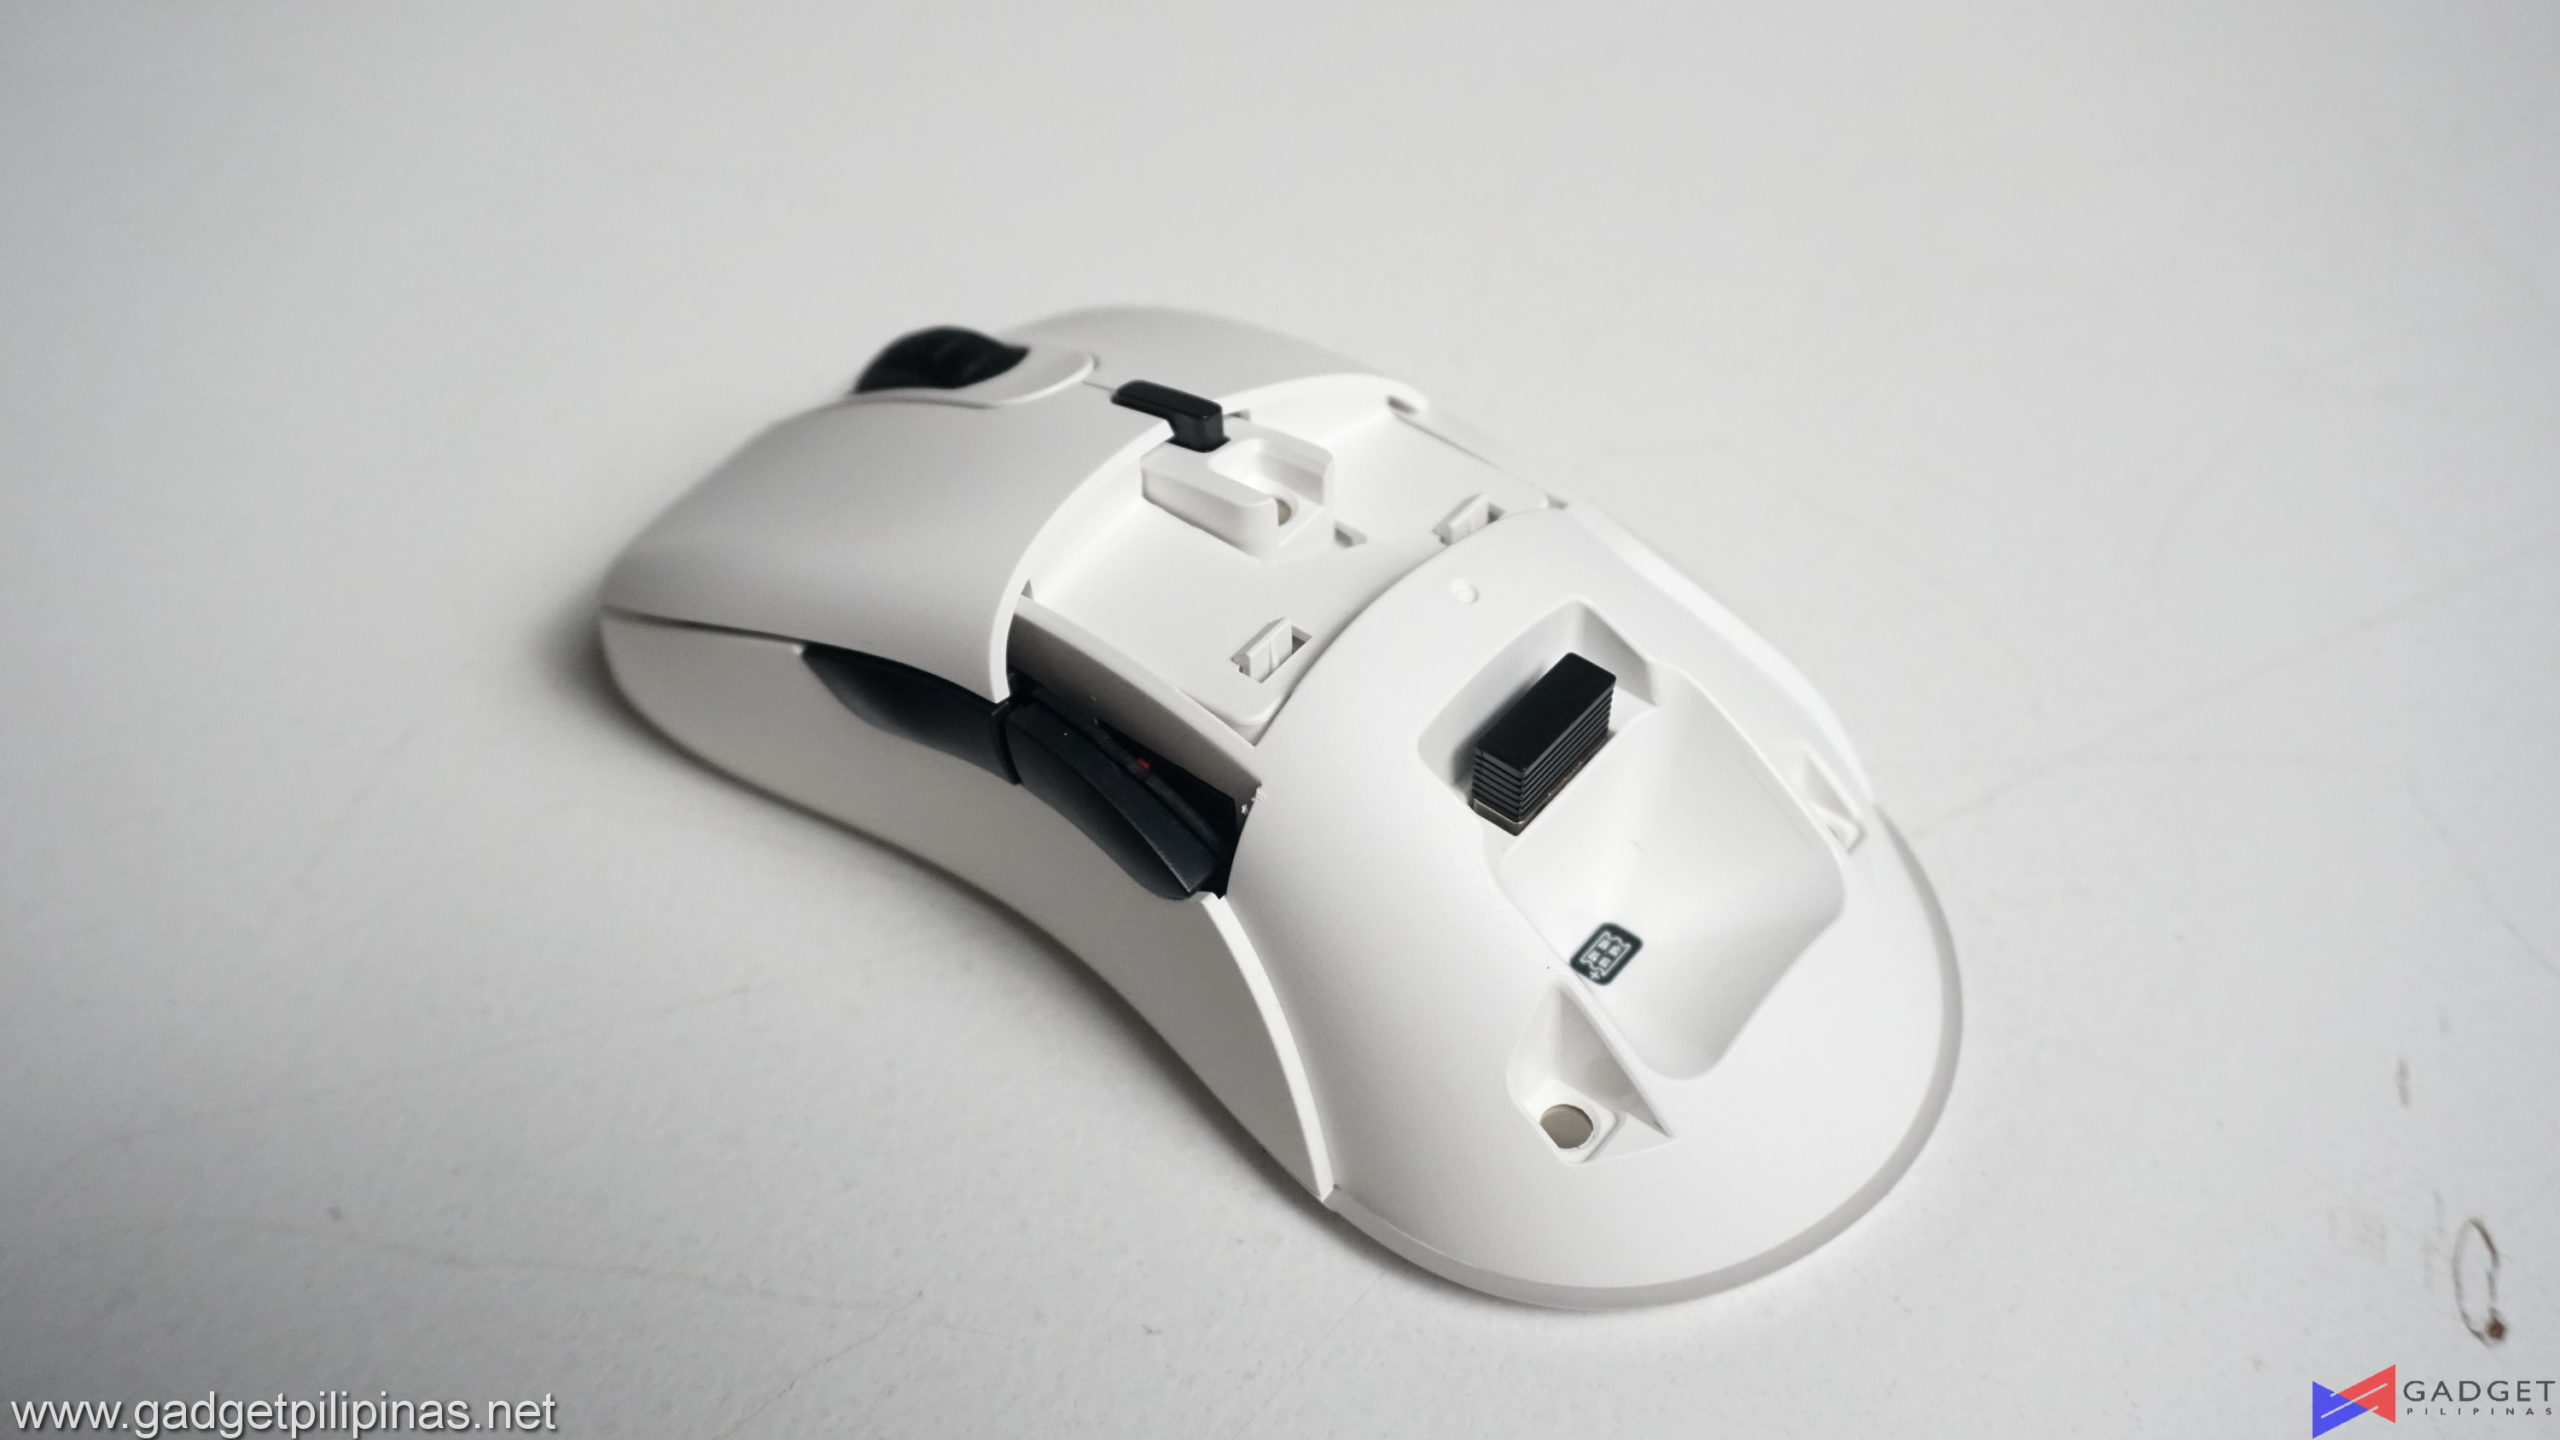 The back cover of the mouse can be removed to reveal the storage compartment of the USB Type-A wireless receiver.
Fantech Helios Go XD5 Software
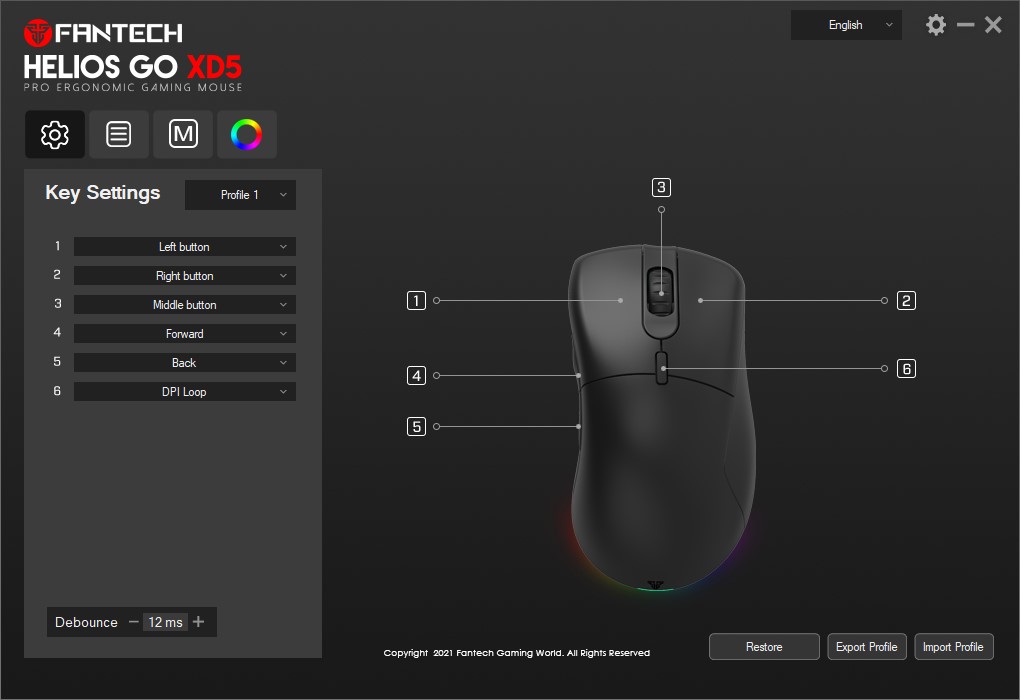
Design-wise, the software of the Helios Go XD5 is one of the cleanest among non-mainstream gaming brands. Buttons, drop-down menus, and settings are listed well are easy to navigate through. The homepage of the software shows key settings of the mouse as well as the option to select profiles up to importing and exporting profiles. The mouse can save up to 4 profiles which can be toggled via the software. The Debounce time for the switches can also be configured on the homepage.
There’s no battery life indicator anywhere at all and it’s the most important setting for a wireless mouse. Frankly, the lack of a battery life indicator is beyond frustrating. Sure the mouse blinks red when it’s near-zero but we don’t know the exact percentage not to mention estimating how long do we have left.
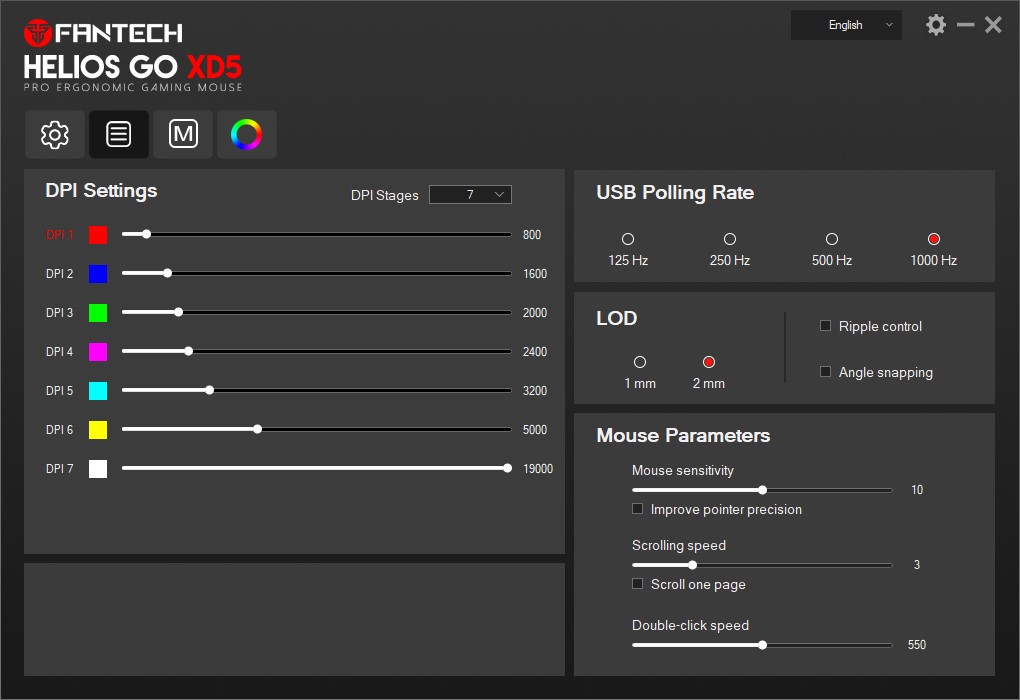 The second tab lets you adjust the DPI of each stage as well as how many DPI stages will be stored on the profile. Most of the technical mouse settings can be found here such as Polling Rate, Lift-off-Distance, and double click speed. The scrolling speed can also be adjusted on the XD5 via software which is an uncommon setting to be found in software. The scrolling speed adjustment is commonly found via tightening or loosening a certain physical dial on higher-level mice.
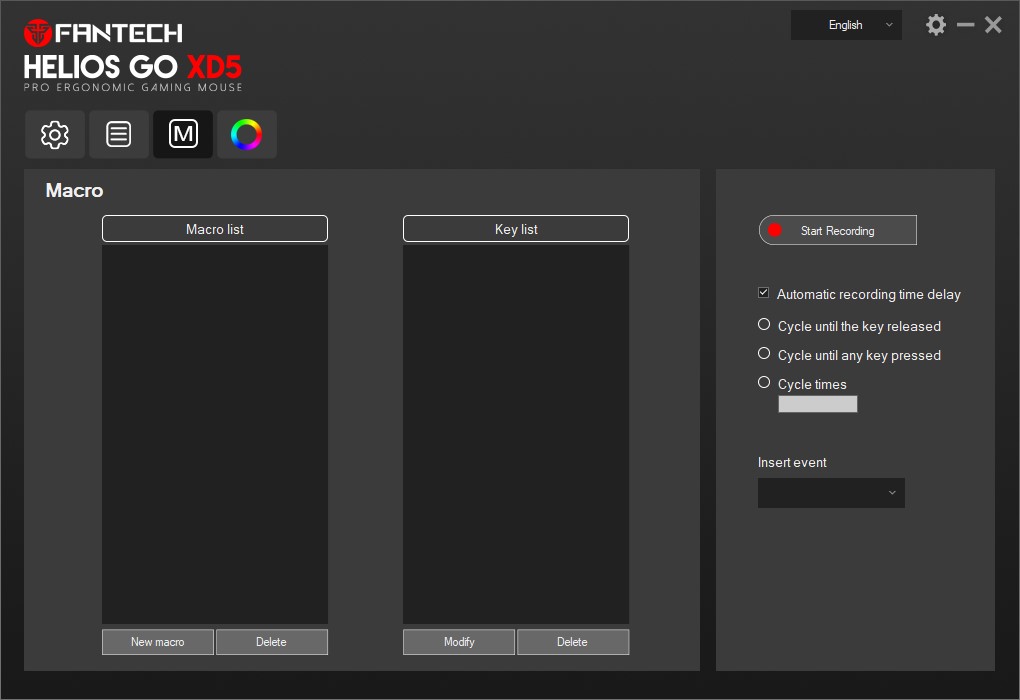 Macro recording function passes our standard as it has the crucial feature to adjust the millisecond delay between each keystroke. Additionally, it provides more flexibility as you can also change the key event from key down to key up and vice versa.
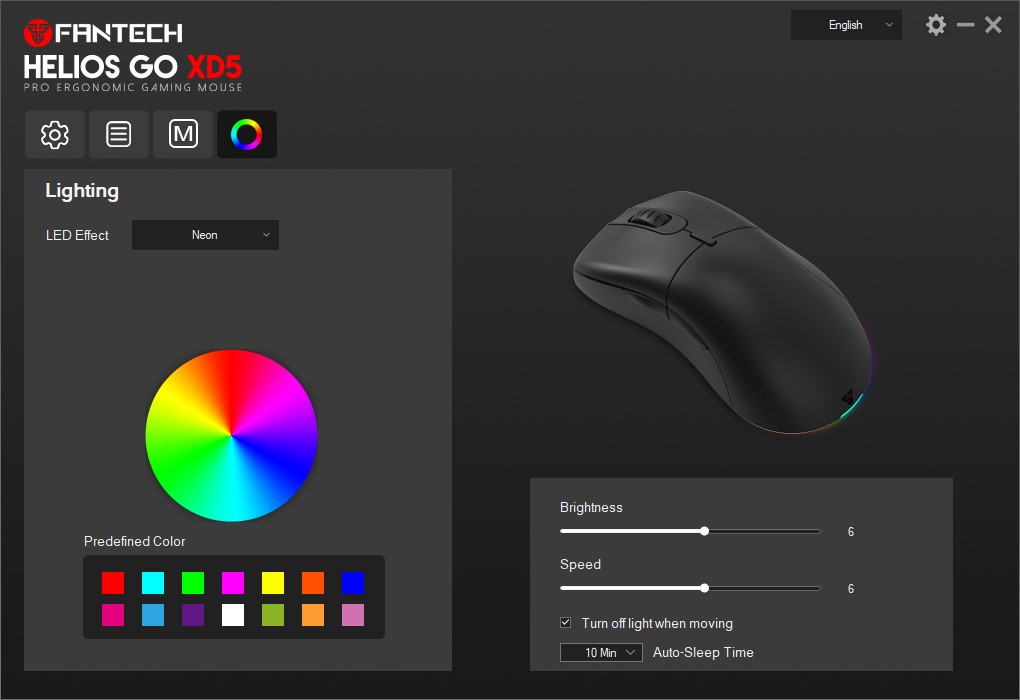 The fourth tab lets you handle the mouse’s RGB lighting. There are only six presets available on the profile. The neat setting to turn off the RGB lighting once you move the mouse can be toggled here as well as the auto sleep timer of the RGB lighting.
Fantech Helios Go XD5 Mouse Testing
Disclaimer and Reviewer Profile: Our gaming mice reviews, albeit slightly technical, are still subjective to the writer’s preference and standard especially on the shape. My hybrid claw grip isn’t too comfortable on the Helios Go XD5 and its 72-gram weight but it just took me quite a bit of time to get used to and properly adjust my grip. My time with the Quasar Prime Wireless split between work and gaming as I used the mice for my different laptop reviews and playing DOTA 2 and Valorant at 8,000 DPI. What may be comfortable to me may not reflect our entire audience.
Testing Setup and Methodology
| Mouse Testing Setup | |
| Mousepad | Xraypad Thor provided by Gosu Gaming Gears |
| Windows Pointer Speed | 6/11, Pointer Precision Disabled |
| DPI Level | 800 DPI |
| Polling Rate | 1000Hz |
We are testing the Fantech Helios Go XD5 Gaming Mouse’s performance using the MouseTest v1.5.3 software originally developed by Microe. For consistent and accurate results, we are using the XRaypad Thor Gaming Mouse pad throughout our testing. DPI and Polling levels are set to 800 and 1000 respectively.
Our most recent Razer Orochi v2 mouse review showed us the need to test wireless gaming mice at 30-50% battery levels moving forward as sensor issues only show up at lower battery life. That said, we tested the Fantech Helios Go XD5 at roughly 30-35% battery level to see its sensor performance at drained levels which likely reflects real-world usage as people only charge the mouse when it’s drained as they don’t really notice the battery life of their mice.
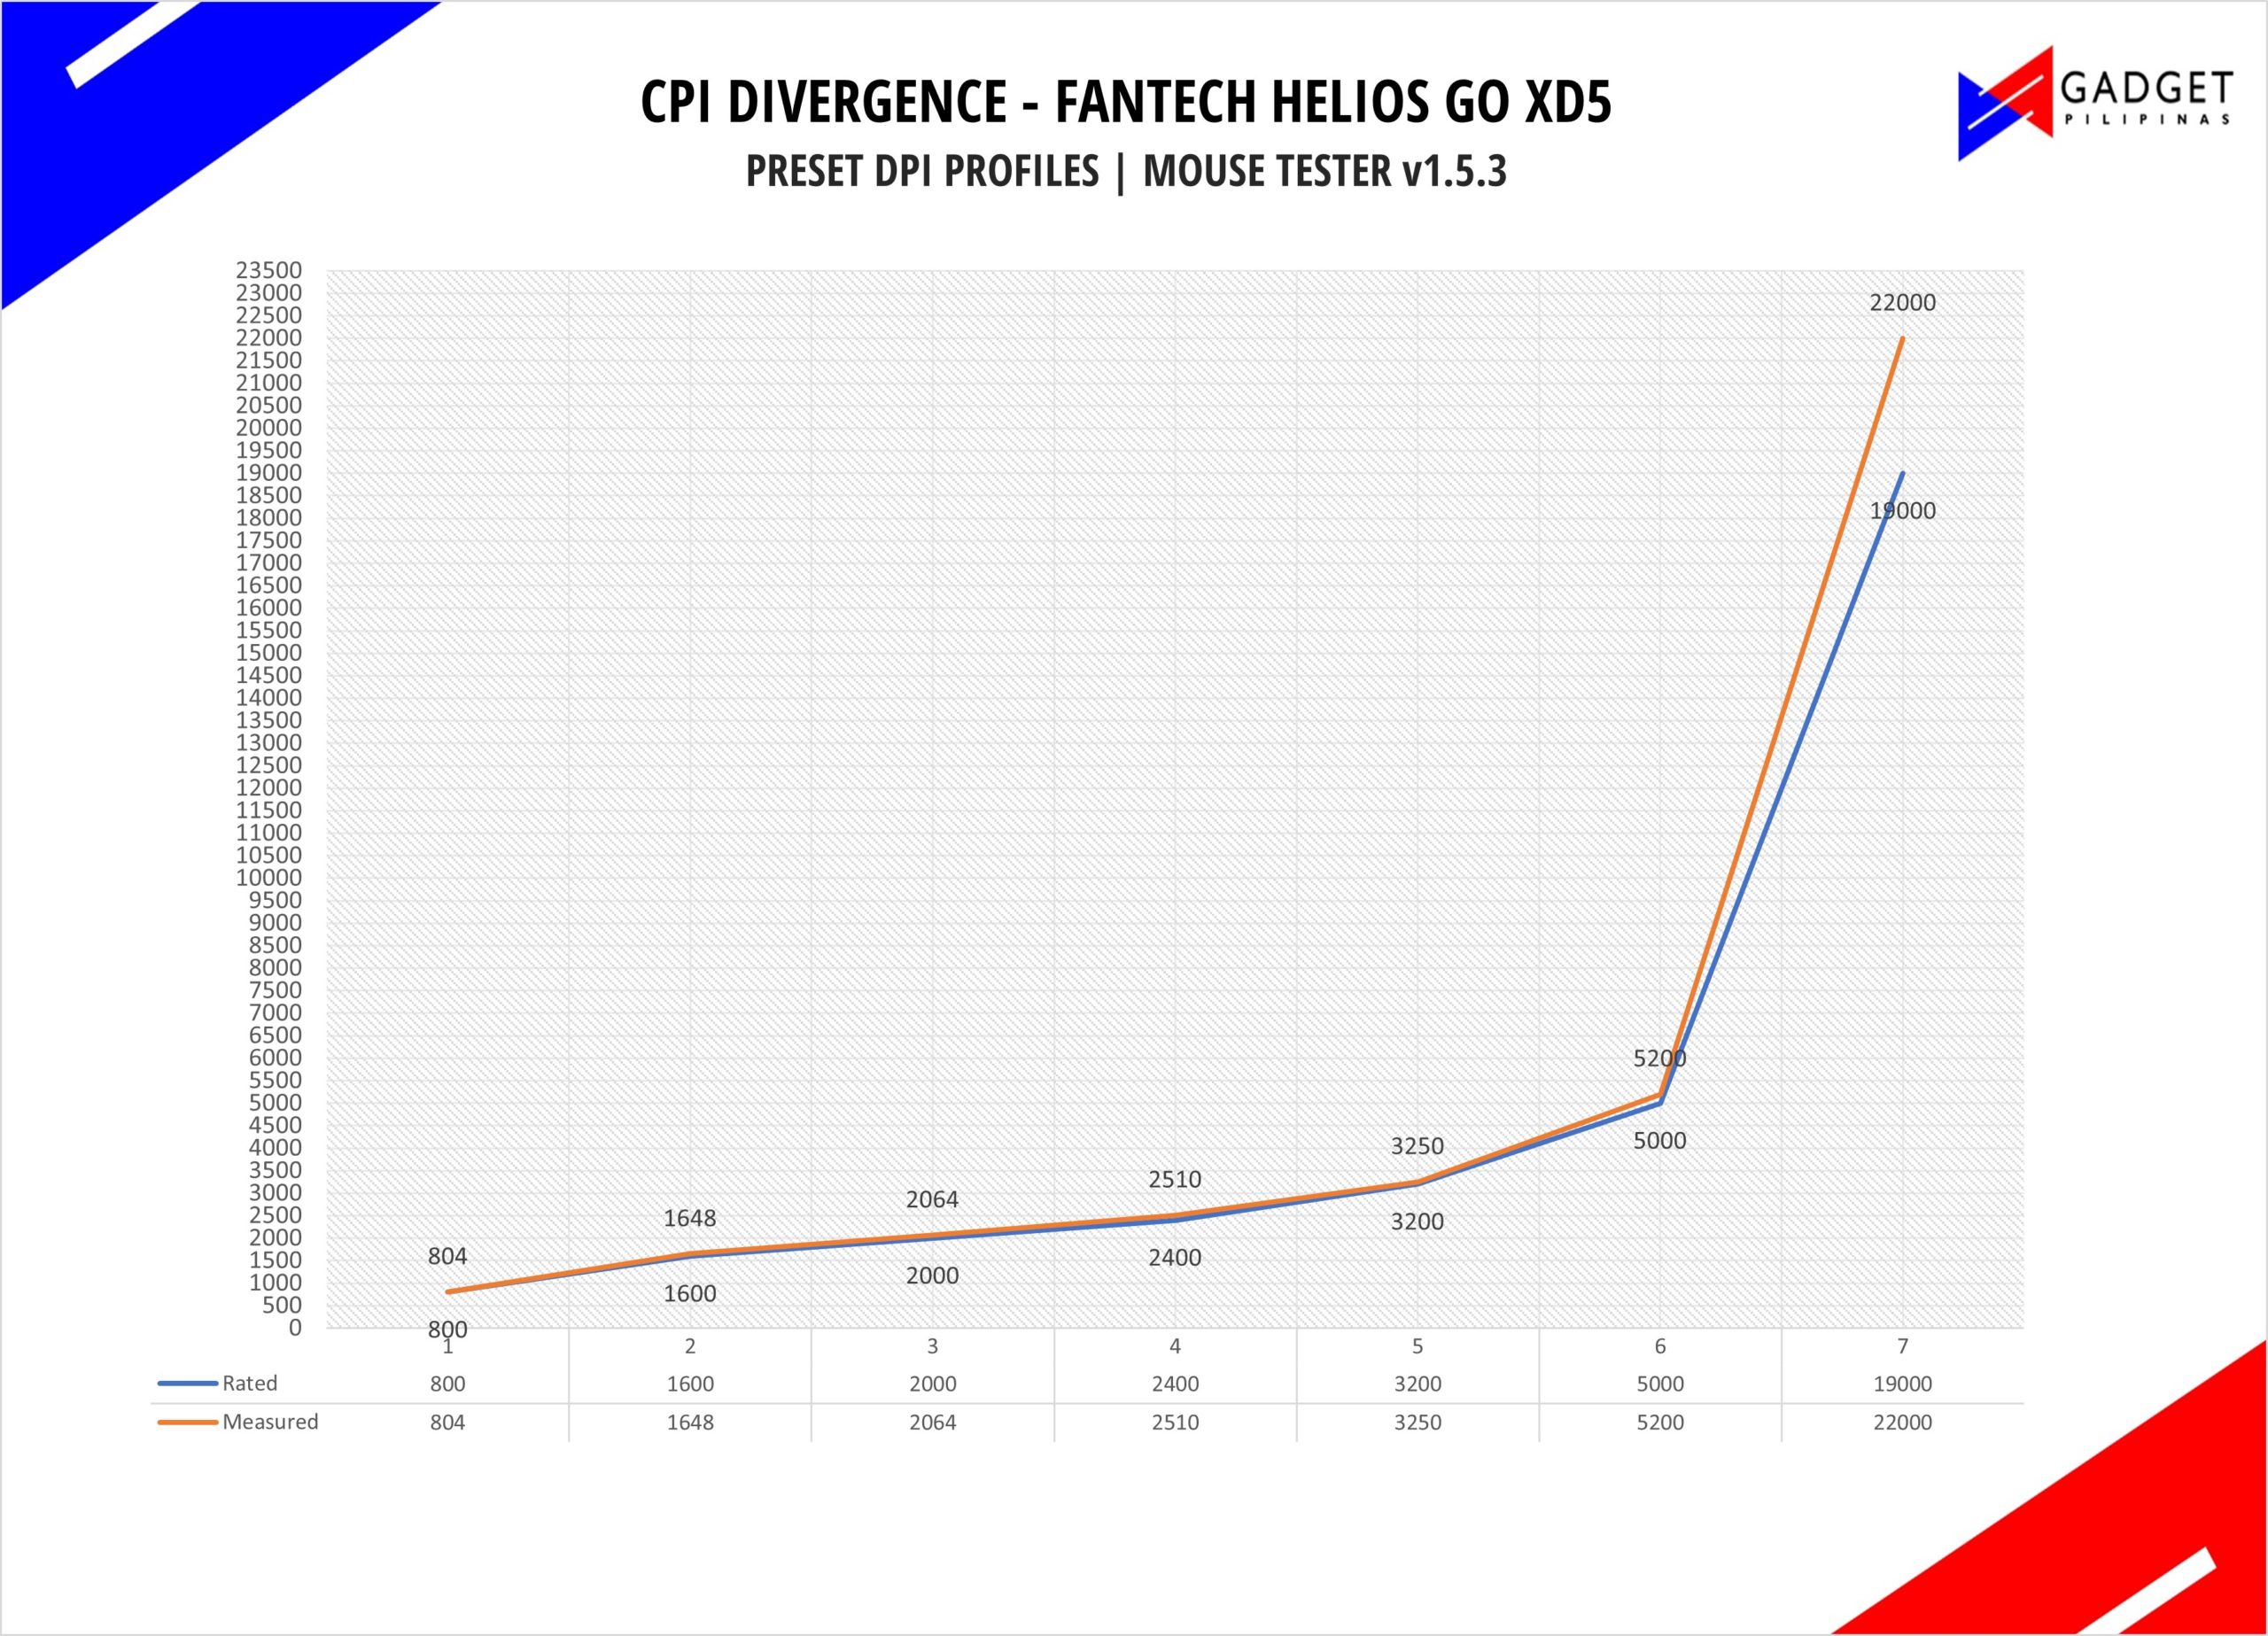 CPI Divergence graph tells us how accurate is the current CPI level versus the rated CPI. A divergence of less than 3% is well within the margin of error considering there are lots of external factors that affect the results such as dust, mousepad and mouse skate wear & tear, battery life, and human error. For this test, we measured each of the Fantech Helios Go XD5’s preset 7-DPI levels – 800, 1600, 2000, 2400, 3200, 5000, and 19000.
Polling Rate & Stability
- Fantech Helios Go XD5 Mouse Review Sensor Polling Rate
- Fantech Helios Go XD5 Mouse Review Sensor Polling Rate
- Fantech Helios Go XD5 Mouse Review Sensor Stability
- Fantech Helios Go XD5 Mouse Review Sensor Stability
At a 1000Hz polling rate, the Fantech Helios Go XD5 performs well within its specifications. The outliers present on the graphs are for every time I slowed down and switch to the opposite direction during the measurement process.
Input Lag & Smoothing
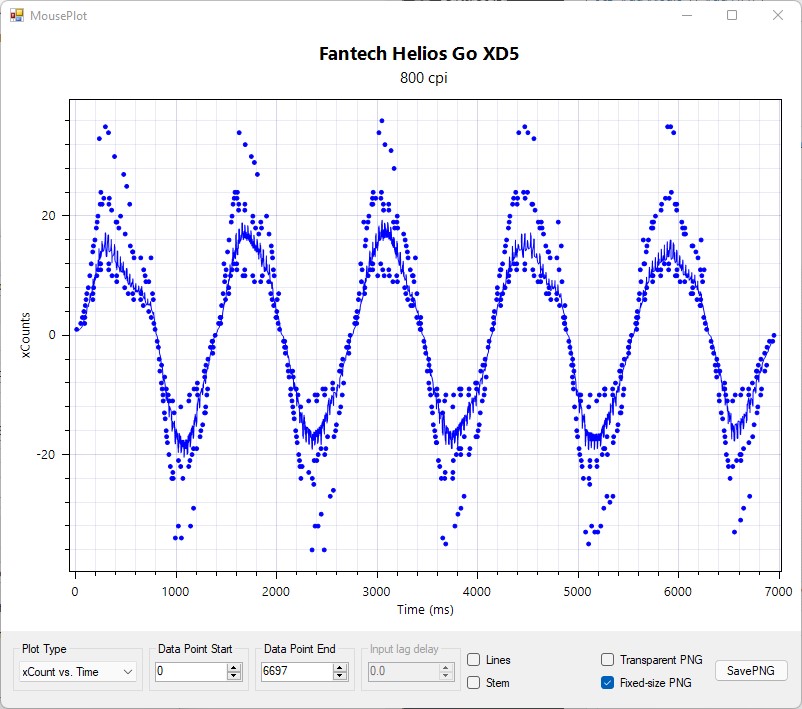 There’s no noticeable input lag during my time with the Panther Quasar Prime except for instances where the battery is below 15%. While our testing was done at 100% battery level, the application still recorded very minor jitter which isn’t perceivable. That said, it’s best to always keep the Panther Quasar Prime above 50% during wireless mode.
There’s no noticeable input lag during my time with the Fantech Helios Go Wireless even at near-dead battery. There are minor jitters per the results of our testing but they aren’t really noticeable at 800 DPI. That said, it’s best to keep the Fantech Helios Go XD5 above 50% for the best possible tracking experience.
Conclusion
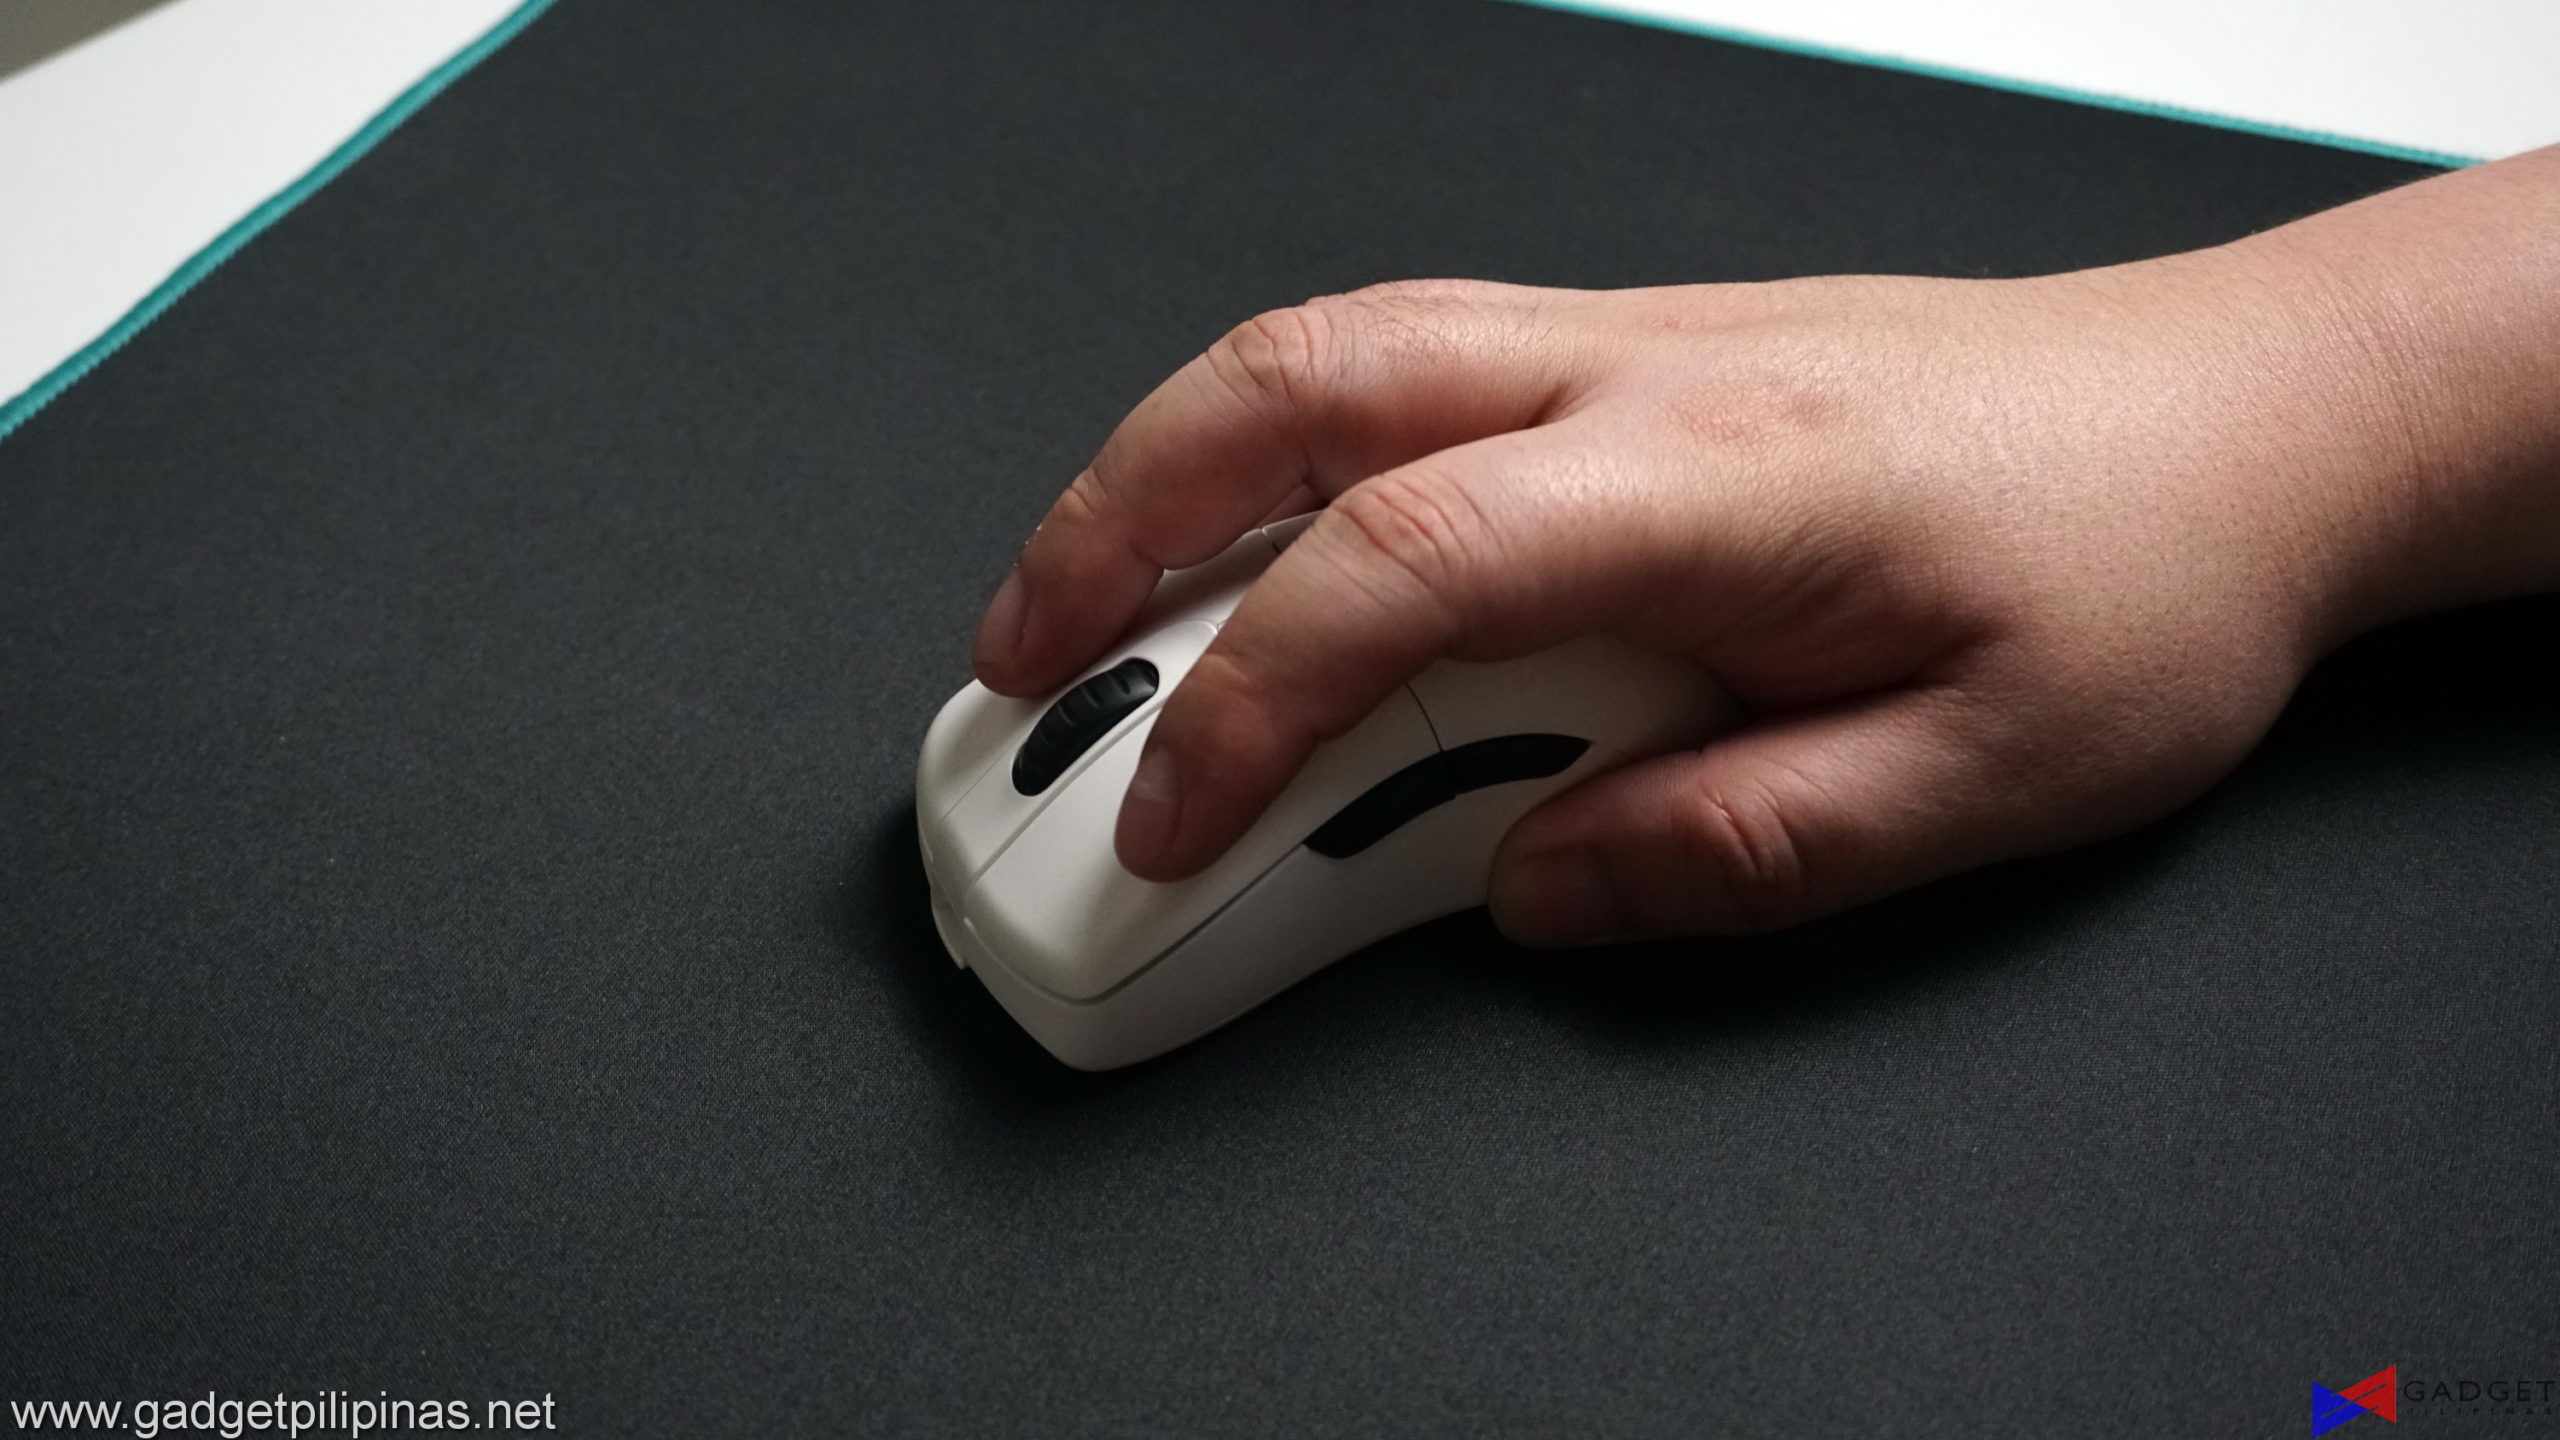 Let’s break it down into five parts:
Performance – There’s really nothing to complain about the Fantech Helios GO XD5. With around two-months worth of usage, I have not noticed any sensor performance degradation regardless of battery level unlike other mice in this price rage. Its scroll wheel texture and ridges could definitely be improved to provide more grip when scrolling as well as better tactile feedback. Despite the recorded stutters in our tests, I don’t experience aim displacements while doing extended swipes or flicks.
Build Quality – Its build quality can easily match those of mainstream brands such as Logitech and HyperX. There’s no creaking or sidewall flex even if I overexaggerate the strength of my grip on the mouse. The improvement over the XD3 in such a short period is a testament to the brand’s dedication to providing quality gaming peripherals on a budget. That said, the top cover is loose on the bottom left side much so that I can feel it when I touch it but it doesn’t really affect performance as it’s way off the regular thumb placement for all grips.
Features – The Fantech Helios Go XD5 sports typical wireless gaming mice features with much more added functionality and flexibility thanks to the well-designed software. Moreover, the extra PTFE skates and relatively long USB Type-C cable are a nice addition to the overall package. However, do note that not all Type-C cables will fit the Fantech Helios XD5’s USB-C port, only cables with thin cable guards will fit.
Battery Life – The built-in 300mAh battery is rated for up to 40 hours or roughly 5-days worth of a daily 8-hour gaming session. Thanks to its superb RGB lighting auto-off feature and efficient PixArt 3370 sensor, I was able to work and play for almost a week without having to recharge the mouse. Charging time took me around 2 hours by estimate as there’s no battery indicator to let you know it’s finished, only the green blinking LED which you might miss when you’re using the mouse as your hand is covering the lighting zone.
Price – At Php 3,000 pesos, the Fantech Helios Go XD5 definitely dances in the thin line between the premium mouse category and entry-level mice. For a bit more you could spend for a mainstream mouse or you could save up and get other budget mice such as the XD3 and call it day. But for what the Fantech Helios XD5 offers in its performance to feature suit, the Php 700 difference is well worth it especially if you like its ergonomic shape and size.
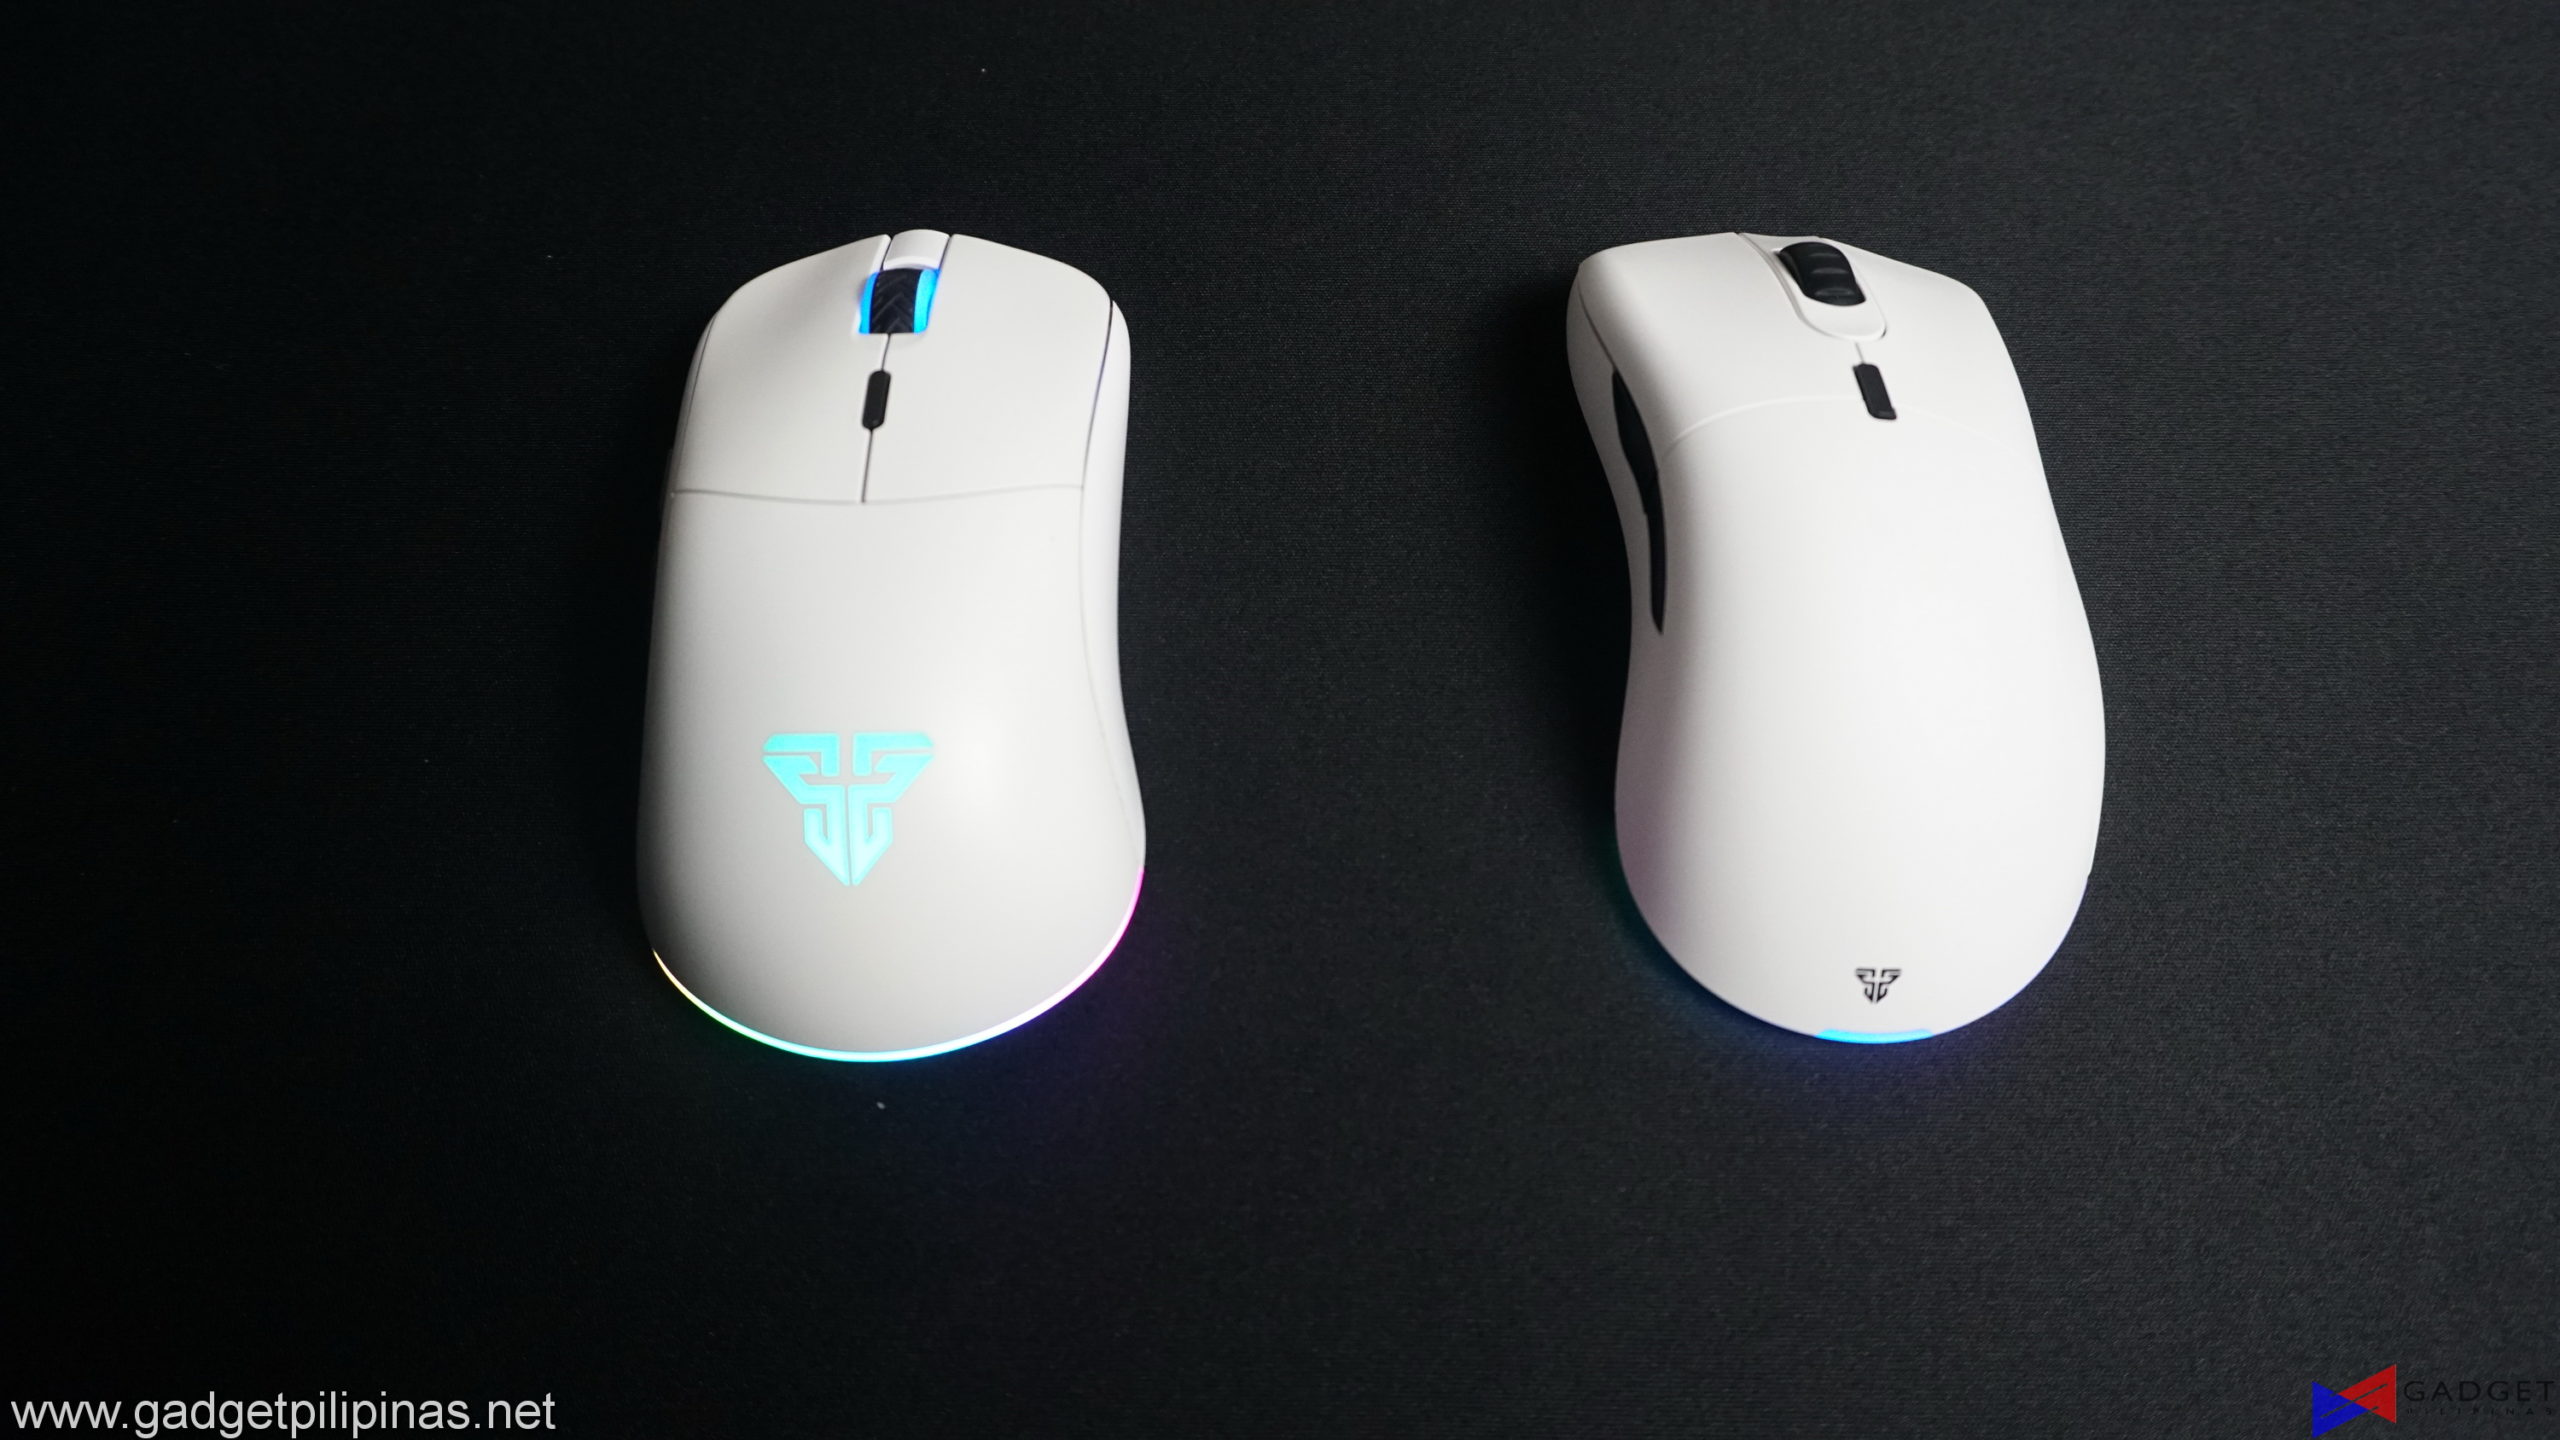 Coming from the Fantech Helios XD3, the Fantech Helios Go XD5 presents numerous improvements in all aspects from build quality, specs, to software. Shape aside, the Fantech Helios Go XD5 checks a lot of boxes for it to be considered premium and it definitely is. There are some things they could definitely improve such as the battery life and scroll wheel, but apart from that, there’s really nothing to complain about as it’s well built from the ground up. It’s definitely a gaming mouse with minimal compromises and the Helios Go XD5 is proof that the brand is taking the right step and every direction to provide quality gaming peripherals to its customers and enthusiasts.

Grant is a Financial Management graduate from UST. His passion for gadgets and tech crossed him over in the industry where he could apply his knowledge as an enthusiast and in-depth analytic skills as a Finance Major. His passion allows him to earn at the same time help Gadget Pilipinas' readers in making smart, value-based decisions and purchases with his reviews and guides.

